# Exceptionless Documentation
Exceptionless is a real-time error monitoring platform for .NET, JavaScript, and self-hosted deployments.
## Pages
- [Configuration](https://exceptionless.com/docs/clients/dotnet/configuration/)
# Configuration
There are a few ways to configure Exceptionless in your project. We'll cover them here or you can jump to app-specific examples: [Console App Example](/docs/clients/dotnet/guides/console-apps-example), [Web Server Example](/docs/clients/dotnet/guides/web-server-example).
---
- ExceptionlessClient Configuration
- Configuring With Code
- Configuring With Attributes
- Configuring With Environment Variables
- Using Web.config
- Available Configuration Options
- ServerUrl
- IncludePrivateInformation
- Extended Data
- Default Tags
- Default Data
- Versioning
- Offline storage
- Configuration File
- Code
- Disabling Exceptionless
- Configuration File
- Attribute
- Self Hosted Options
- Configuration file
- Attribute
## ExceptionlessClient Configuration
You have a few options for how you might configure your Exceptionless client. Here are some examples of how to do this.
### Configuring With Code
The examples below show the various ways (configuration file, attributes or code) that Exceptionless can be configured in your application.
```csharp
using Exceptionless;
var client = new ExceptionlessClient(c => {
c.ApiKey = "YOUR_API_KEY";
c.SetVersion(version);
});
// You can also set the api key directly on the default instance.
ExceptionlessClient.Default.Configuration.ApiKey = "YOUR_API_KEY"
```
### Configuring With Attributes
You can also configure Exceptionless using attributes like this:
```csharp
using Exceptionless.Configuration;
[assembly: Exceptionless("YOUR_API_KEY")]
```
The Exceptionless assembly attribute will only be picked up if it’s defined in the entry or calling assembly. If you have placed the above attribute in different location you’ll need to call the method below during startup.
```csharp
using Exceptionless;
ExceptionlessClient.Default.Configuration.ReadFromAttributes(typeof(MyClass).Assembly)
```
### Configuring With Environment Variables
You can also add an Environment variable or application setting with the key name `Exceptionless:ApiKey` and your `YOUR_API_KEY` as the value.
### Using Web.config
Exceptionless can be configured using a config section in your web.config or app.config depending on what kind of project you have. Installing the correct NuGet package should automatically add the necessary configuration elements. It should look like this:
```xml
...
...
```
Now, before you can fully configure your Exceptionless client, it's important to know what options are available for you to configure. We'll cover that below.
### Available Configuration Options
When initializing the Exceptionless client, you can set any of the following values:
* ServerUrl
* IncludePrivateInformation
* DefaultTags
* DefaultData
### ServerUrl
The `ServerUrl` is used when you are self-hosting Exceptionless and need to point your client to your self-hosted server. This one is pretty self-explanatory.
### IncludePrivateInformation
This is a boolean value that will automatically strip private info like credit card numbers and passwords from being sent in event handling. The default is `true`. However, you can set this value like this:
```cs
using Exceptionless;
ExceptionlessClient.Default.Configuration.IncludePrivateInformation = false;
```
You can also set it in a global configuration file like this:
```xml
```
### Extended Data
The next two properties that can be set when configuring the Exceptionless client can be considered features that extend your data. If you want to apply additional information to every single event that is fired, you would use one of these two settings.
### Default Tags
Just as you are able to apply tags to individual events, you can set default tags that will apply to all events you submit. Configuring this is simple. Here's a quick example:
```cs
using Exceptionless;
ExceptionlessClient.Default.Configuration.DefaultTags.Add("Tag1");
```
You can also set this up globally with a configuration file like this:
```xml
```
### Default Data
When viewing your stacks and individual events, you can see additional information about the events on the Extended Data tab. Data found there is usually passed in by adding info to the data object in the event payload. Here's an example of how you might do that:
```cs
using Exceptionless;
ExceptionlessClient.Default.Configuration.DefaultData["Data1"] = "Exceptionless";
```
You can also configure this with a configuration file like this:
```xml
```
## Versioning
By specifying an application version you can [enable additional functionality](/docs/versioning). By default, an application version will try to be resolved from assembly attributes. However, it's a good practice to specify an application version if possible using the code below.
```csharp
using Exceptionless;
ExceptionlessClient.Default.Configuration.SetVersion("1.2.3");
```
## Offline storage
By default, Exceptionless keeps events in memory. This means if the application exits before the event can be sent to the server, the event will not be sent on restart. This can be overcome by persisting events to disk.
To persist events to disk for offline scenarios or to ensure no events are lost between application restarts, you will need to configure your Exceptionless client to know to store the events on disk and to know where to store them. You can simply pass in a configuration value that includes the storage path. When selecting a folder path, make sure that the identity the application is running under has full permissions to that folder.
Please note that this adds a bit of overhead as events need to be serialized to disk on submission and is not recommended for high throughput logging scenarios.
### Configuration File
```xml
```
### Code
```csharp
// Use folder storage
ExceptionlessClient.Default.Configuration.UseFolderStorage("PATH OR FOLDER NAME");
// Use isolated storage
ExceptionlessClient.Default.Configuration.UseIsolatedStorage();
```
## Disabling Exceptionless
You can disable Exceptionless from reporting events during testing using the `Enabled` setting.
### Configuration File
```xml
```
### Attribute
```csharp
using Exceptionless.Configuration;
[assembly: Exceptionless("YOUR_API_KEY", Enabled=false)]
```
## Self Hosted Options
The Exceptionless client can also be configured to send data to your [self hosted instance](/docs/self-hosting/). This is configured by setting the `serverUrl` setting to point to your Exceptionless instance.
### Configuration file
```csharp
```
### Attribute
```csharp
using Exceptionless.Configuration;
[assembly: Exceptionless("YOUR_API_KEY", ServerUrl = "http://localhost")]
```
---
[Next > Client Configuration Values](/docs/clients/dotnet/client-configuration-values)
- [Configuration](https://exceptionless.com/docs/clients/javascript/client-configuration/)
# Configuration
- Installation
- Browser
- Node.js
- Configuration
- Offline Storage
- API Key
- Extended Data
- Default Tags
- Default Data
- General Data Protection Regulation
- Versioning
- Self Hosted Options
***
## Installation
### Browser
1. Install the package by running `npm install @exceptionless/browser`
2. Add the Exceptionless client to your app:
```js
import { Exceptionless } from "@exceptionless/browser";
await Exceptionless.startup((c) => {
c.apiKey = "API_KEY_HERE";
});
```
### Node.js
1. Install the package by running `npm install @exceptionless/node`.
2. Add the Exceptionless client to your app:
```js
import { Exceptionless } from "@exceptionless/node";
await Exceptionless.startup(c => {
c.apiKey = "API_KEY_HERE";
});
```
***
## Configuration
_NOTE: The only required setting that you need to configure is the client's `apiKey`._ However, many values may be important for your application. Specifically, you may want to consider persisting events to disk.
### Offline Storage
By default, Exceptionless keeps events in memory and stores server configuration to local storage if available. This means if the application exits before the event can be sent to the server, the event will not be sent on restart. This can be overcome by persisting events to disk as well.
This can be done by setting the configuration value like this:
```js
import { Exceptionless } from "@exceptionless/browser";
await Exceptionless.startup(c => {
c.usePersistedQueueStorage = true;
});
```
### API Key
You can set the `apiKey` two different ways. The first is by passing it to the
startup function. This is the recommended way if you have no other client
configuration settings to configure.
```js
import { Exceptionless } from "@exceptionless/browser";
await Exceptionless.startup("API_KEY_HERE");
```
The second way is to set it on the configuration instance passed to startup.
This is the recommended way when configuring multiple settings.
```js
import { Exceptionless } from "@exceptionless/browser";
await Exceptionless.startup(c => {
c.apiKey: 'API_KEY_HERE',
c.serverUrl: 'http://localhost:5200'
});
```
**NOTE**: creating new instances is good for sending custom events. **Automatic catching of errors uses default client**. Make sure you setup default client as well if you need automatic catching of unhandled errors.
### Extended Data
You can include information that is set globally and provided with every event you send. There are two types of data that can be provided this way: Default Tags and Default Data.
#### Default Tags
To add default tags to every request, you can configure your client like this:
```js
import { Exceptionless } from "@exceptionless/browser";
await Exceptionless.startup(c => {
c.defaultTags.push("Tag1", "Tag2");
});
```
#### Default Data
You can set up default data to be sent with every request very similarly to how you send default tags. You would do it like this:
```js
import { Exceptionless } from "@exceptionless/browser";
await Exceptionless.startup(c => {
c.defaultData["data"] = "My custom data";
});
```
### General Data Protection Regulation
By default the Exceptionless Client will report all available metadata which could include potential PII data. There are various ways to limit the scope of PII data collection. For example, one could use [Data Exclusions](/docs/security#data-exclusions) to remove sensitive values but it only applies to specific collection points such as `Cookie Keys`, `Form Data Keys`, `Query String Keys` and `Extra Exception properties`. Additional data may need to be removed for the GDPR like the collection of user names and IP Addresses. Shown below is several examples of how you can configure the client to remove this additional metadata.
You have the option of finely tuning what is collected via individual setting options or you can disable the collection of all PII data by setting the `includePrivateInformation` to `false`.
```js
import { Exceptionless } from "@exceptionless/browser";
await Exceptionless.startup(c => {
c.includePrivateInformation = false;
});
```
If you wish to have a finer grained approach which allows you to use Data Exclusions while removing specific meta data collection you can do so via code. Please note if the below doesn't meet your needs you can always write a plugin.
```js
import { Exceptionless } from "@exceptionless/browser";
await Exceptionless.startup(c => {
// Include the username if available.
c.includeUserName = false;
// Include the MachineName in MachineInfo.
c.includeMachineName = false;
// Include Ip Addresses in MachineInfo and RequestInfo.
c.includeIpAddress = false;
// Include Cookies, please note that DataExclusions are applied to all Cookie keys when enabled.
c.includeCookies = false;
// Include Form/POST Data, please note that DataExclusions are only applied to Form data keys when enabled.
c.includePostData = false;
// Include Query String information, please note that DataExclusions are applied to all Query String keys when enabled.
c.includeQueryString = false;
});
```
## Versioning
By specifying an application version you can [enable additional functionality](/docs/versioning). It's a good practice to specify an application version if possible using the code below.
```js
import { Exceptionless } from "@exceptionless/browser";
await Exceptionless.startup(c => {
c.version = "1.2.3";
});
```
## Self Hosted Options
The Exceptionless client can also be configured to send data to your [self hosted instance](/docs/self-hosting/). This is configured by setting the `serverUrl` setting to point to your Exceptionless instance.
```js
import { Exceptionless } from "@exceptionless/browser";
await Exceptionless.startup(c => {
c.apiKey: 'API_KEY_HERE',
c.serverUrl: 'http://localhost:5200'
});
```
***
[Next > Client Configuration Values](/docs/clients/javascript/client-configuration-values)
- [React](https://exceptionless.com/docs/clients/javascript/guides/react/)
# React
Exceptionless can be configured in just about any JavaScript environment, but this section is dedicated to set up and use within the React framework.
### Install
To install exceptionless, you can use npm or yarn:
npm - `npm install @exceptionless/react`
yarn - `yarn add @exceptionless/react`
### Initializing the Client
Exceptionless provides a default singleton client instance. While we recommend
using the default client instance for most use cases, you can also create
custom instances (though that's beyond the scope of this guide).
```javascript
import { Exceptionless } from "@exceptionless/react";
await Exceptionless.startup((c) => {
c.apiKey = "YOUR API KEY";
});
```
You can see an additional parameter passed into the configuration object as an
example. To see all the available options, take a look at our
[configuration values here](/docs/clients/javascript/client-configuration-values).
### Using Exceptionless in a React App
```javascript
import { Exceptionless, ExceptionlessErrorBoundary } from "@exceptionless/react";
class App extends Component {1
async componentDidMount() {
await Exceptionless.startup((c) => {
c.apiKey = "YOUR API KEY";
});
}
render() {
return (
// YOUR APP COMPONENTS HERE
);
}
}
export default App;
```
With that set up, you can use the Exceptionless client anywhere in your app.
---
[Next > Vue](/docs/clients/javascript/guides/vue)
- [Client Configuration Values](https://exceptionless.com/docs/clients/javascript/client-configuration-values/)
# Client Configuration Values
- About
- Usage Example
- Updating Client Configuration settings
- Subscribing to Client Configuration Setting changes
## About
[Read about client configuration and view in-depth examples](/docs/project-settings)
## Usage Example
The below example demonstrates **how we would turn on or off log event submissions at runtime** without redeploying the app or changing server config settings.
First, we add a (completely arbitrary for this example) `enableLogSubmission` client configuration value key with value `true` in the Project's Settings in the Exceptionless dashboard.
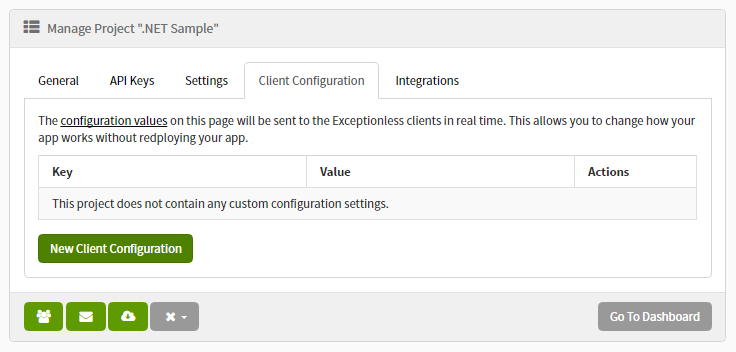
Then, we register a new client side plugin that runs each time an event is created. If our key (`enableLogSubmission`) is set to false and the event type is set to log, we will discard the event.
```js
import { Exceptionless } from "@exceptionless/browser";
await Exceptionless.startup(c => {
c.addPlugin('Conditionally cancel log submission', 100, (context) => {
var enableLogSubmission = context.client.config.settings['enableLogSubmission'];
// only cancel event submission if it’s a log event and
// enableLogSubmission is set to a value and the value is not true.
if (context.event.type === 'log' && (!!enableLogSubmission && enableLogSubmission !== 'true')) {
context.cancelled = true;
}
});
});
```
***
## Updating Client Configuration settings

All project settings are synced to the client in almost real time. When an event is submitted to Exceptionless we send down a response header with the current configuration version. If a newer version is available we will immediately retrieve and apply the latest configuration.
By default the client will check after `5 seconds` on client startup (*if no events are submitted on startup*) and then every `2 minutes` after the last event submission for updated configuration settings.
- Checking for updated settings doesn't count towards plan limits.
- Only the current configuration version is sent when checking for updated settings (no user information will ever be sent).
- If the settings haven't changed, then no settings will be retrieved.
You can also **turn off the automatic updating of configuration settings when idle** using the code below.
```js
import { Exceptionless } from "@exceptionless/browser";
await Exceptionless.startup(c => {
c.updateSettingsWhenIdleInterval = -1;
});
```
You can also manually update the configuration settings using the code below.
```js
import { Exceptionless, SettingsManager } from "@exceptionless/browser";
await SettingsManager.updateSettings(Exceptionless.config);
```
## Subscribing to Client Configuration Setting changes
To be notified when client configuration settings change, subscribe to them using the below code.
```js
import { Exceptionless } from "@exceptionless/browser";
await Exceptionless.startup(c => {
c.subscribeServerSettingsChange((configuration) => {
// configuration.settings contains the new settings
});
});
```
***
[Next > Sending Events](/docs/clients/javascript/sending-events)
- [Vue](https://exceptionless.com/docs/clients/javascript/guides/vue/)
# Vue
Vue is one of the more popular JavaScript frameworks out there, and Exceptionless has your back if you're working with it. Getting started is simple.
### Install
To install exceptionless, you can use npm or yarn:
npm - `npm install @exceptionless/vue`
yarn - `yarn add @exceptionless/vue`
### Initializing the Client
Exceptionless provides a default singleton client instance. While we recommend
using the default client instance for most use cases, you can also create
custom instances (though that's beyond the scope of this guide).
```javascript
import { Exceptionless } from "@exceptionless/vue";
await Exceptionless.startup((c) => {
c.apiKey = "YOUR API KEY";
});
```
You can see an additional parameter passed into the configuration object as an
example. To see all the available options, take a look at our
[configuration values here](/docs/clients/javascript/client-configuration-values).
### Using Exceptionless in a Vue App
```javascript
import { createApp } from "vue";
import App from "./App.vue";
import { Exceptionless, ExceptionlessErrorHandler } from "@exceptionless/vue";
Exceptionless.startup((c) => {
c.apiKey = "YOUR API KEY";
});
const app = createApp(App);
// Set the global vue error handler.
app.config.errorHandler = ExceptionlessErrorHandler;
app.mount("#app");
```
With that set up, you can use the Exceptionless client anywhere in your app.
---
[Next > Angular](/docs/clients/javascript/guides/angular)
- [Client Configuration Values](https://exceptionless.com/docs/clients/dotnet/client-configuration-values/)
# Client Configuration Values
## Index
- Index
- About
- Usage Example
- .NET Helpers
- Helpers
- Updating Client Configuration settings
- Subscribing to Client Configuration Setting changes
## About
[Read about client configuration and view in-depth examples](/docs/project-settings)
## Usage Example
The below example demonstrates **how we would turn on or off log event submissions at runtime** without redeploying the app or changing server config settings.
First, we add a (completely arbitrary for this example) `enableLogSubmission` client configuration value key with value `true` in the Project's Settings in the Exceptionless dashboard.
Then, we register a new client side plugin that runs each time an event is created. If our key (`enableLogSubmission`) is set to false and the event type is set to log, we will discard the event.
```csharp
ExceptionlessClient.Default.Configuration.AddPlugin("Conditionally cancel log submission", 100, context => {
var enableLogSubmission = context.Client.Configuration.Settings.GetBoolean("enableLogSubmission", true);
// only cancel event submission if it's a log event and enableLogSubmission is false
if (context.Event.Type == Event.KnownTypes.Log && !enableLogSubmission) {
context.Cancel = true;
}
});
```
***
## .NET Helpers
The `GetBoolean` method checks the `enableLogSubmission` key. This helper method makes it easy to consume saved client configuration values. The first parameter defines the settings key (name). The second parameter is optional and allows you to set a default value if the key doesn’t exist in the settings or was unable to be converted to the proper type (e.g., a boolean).
We have a few helpers to convert string configuration values to different system types. These methods also contain overloads that allow you to specify default values.
### Helpers
- `GetString`
- `GetBoolean`
- `GetInt32`
- `GetInt64`
- `GetDouble`
- `GetDateTime`
- `GetDateTimeOffset`
- `GetGuid`
- `GetStringCollection` (breaks a comma delimited list into an IEnumerable of strings)
***
## Updating Client Configuration settings
All project settings are synced to the client in almost real time. When an event is submitted to Exceptionless we send down a response header with the current configuration version. If a newer version is available we will immediately retrieve and apply the latest configuration.
By default the client will check after `5 seconds` on client startup (*if no events are submitted on startup*) and then every `2 minutes` after the last event submission for updated configuration settings.
- Checking for updated settings doesn't count towards plan limits.
- Only the current configuration version is sent when checking for updated settings (no user information will ever be sent).
- If the settings haven't changed, then no settings will be retrieved.
You can also **turn off the automatic updating of configuration settings when idle** using the code below.
```csharp
ExceptionlessClient.Default.Configuration.UpdateSettingsWhenIdleInterval = TimeSpan.Zero;
```
You can also manually update the configuration settings using the code below.
```csharp
await Exceptionless.Configuration.SettingsManager.UpdateSettingsAsync(ExceptionlessClient.Default.Configuration);
```
## Subscribing to Client Configuration Setting changes
To be notified when client configuration settings change, subscribe to them using the below code.
```csharp
ExceptionlessClient.Default.Configuration.Settings.Changed += SettingsOnChanged;
private void SettingsOnChanged(object sender, ChangedEventArgs> args) {
Console.WriteLine("The key {0} was {1}", args.Item.Key, args.Action);
}
```
---
[Next > Platform Guides](/docs/clients/dotnet/guides/)
- [.NET Platform Guides](https://exceptionless.com/docs/clients/dotnet/guides/)
# .NET Platform Guides
This section will provide you with specific guides for setting up and configuring Exceptionless with the most used and current .NET platforms Exceptionless supports. To see the full list of supported platforms, see our [Supported Platforms documentation](/docs/clients/dotnet/supported-platforms).
Exceptionless tries to provide support for platforms as long as Microsoft supports them. As such, you will be able to utilize any of our packages for your applications, but this documentation will focus on our core packages for .NET.
### Platform Guides
* [Console Apps & Services Apps](/docs/clients/dotnet/guides/console-apps-example)
* [Web Server](/docs/clients/dotnet/guides/web-server-example)
---
[Next > Console App Guide](/docs/clients/dotnet/guides/console-apps-example)
- [JavaScript Framework Guides](https://exceptionless.com/docs/clients/javascript/guides/)
# JavaScript Framework Guides
Exceptionless works with all popular JavaScript frameworks on both the front end and the backend including React, Angular, Typescript, Express, and Svelte. Below, you will find our guides for those frameworks.
* [React](/docs/clients/javascript/guides/react)
* [Angular](/docs/clients/javascript/guides/angular)
* [Vue](/docs/clients/javascript/guides/vue)
* [Express](/docs/clients/javascript/guides/express)
Exceptionless should work anywhere JavaScript runs, but if you have specific frameworks you'd like to see covered, let us know or submit a pull request. Our documentation is [open-source and editable](https://github.com/exceptionless/Website/tree/master/content/docs).
---
[Next > React Guide](/docs/clients/javascript/guides/react)
- [Angular](https://exceptionless.com/docs/clients/javascript/guides/angular/)
# Angular
Exceptionless can be configured in just about any JavaScript environment, but this section is dedicated to set up and use within the Angular framework.
### Install
To install exceptionless, you can use npm or yarn:
npm - `npm install @exceptionless/browser`
yarn - `yarn add @exceptionless/browser`
### Initializing the Client
Exceptionless provides a default singleton client instance. While we recommend
using the default client instance for most use cases, you can also create
custom instances (though that's beyond the scope of this guide).
```javascript
import { Exceptionless } from "@exceptionless/browser";
await Exceptionless.startup((c) => {
c.apiKey = "YOUR API KEY";
});
```
You can see an additional parameter passed into the configuration object as an
example. To see all the available options, take a look at our
[configuration values here](/docs/clients/javascript/client-configuration-values).
### Using Exceptionless in an Angular Component
To make use of Exceptionless within a component, you'll import the package like
described above. Your set up will vary depending on your needs, but this is a
quick example of using Exceptionless within the `app` component of a default
Angular project.
```js
import { Component } from '@angular/core';
import { Exceptionless } from "@exceptionless/browser";
Exceptionless.startup((c) => {
c.apiKey = "YOUR API KEY";
});
@Component({
selector: 'app-root',
templateUrl: './app.component.html',
styleUrls: ['./app.component.css']
})
export class AppComponent {
title = 'my-app';
public handleClick(event) {
try {
throw new Error("Whoops!");
} catch (error) {
Exceptionless.submitException(error);
}
}
}
```
In the `app` component's html, clicking a button that calls `handleClick` will immediately throw an error and report it to Exceptionless.
---
[Next > Express](/docs/clients/javascript/guides/express)
- [Sending Events](https://exceptionless.com/docs/clients/dotnet/sending-events/)
# Sending Events
Once [configured](/docs/clients/dotnet/configuration), Exceptionless will automatically send any unhandled exceptions that happen in your application. The sections below will show you how to send us different event types as well as customize the data that is sent in.
You may also want to send us **log messages**, **feature usages** or other kinds of events. You can do this very easily with our fluent api. Find examples, below.
- Log Messages, Feature Usages, 404, and Custom Event Types
- Manually Sending Errors
- Sending Additional Information
- Modifying Unhandled Exception Reports
- Using NLog or Log4net Targets
***
## Log Messages, Feature Usages, 404, and Custom Event Types
```csharp
// Import the exceptionless namespace.
using Exceptionless;
// Submit logs
ExceptionlessClient.Default.SubmitLog("Logging made easy");
// You can also specify the log source and log level.
// We recommend specifying one of the following log levels: Trace, Debug, Info, Warn, Error
ExceptionlessClient.Default.SubmitLog(typeof(Program).FullName, "This is so easy", "Info");
ExceptionlessClient.Default.CreateLog(typeof(Program).FullName, "This is so easy", "Info").AddTags("Exceptionless").Submit();
// Submit feature usages
ExceptionlessClient.Default.SubmitFeatureUsage("MyFeature");
ExceptionlessClient.Default.CreateFeatureUsage("MyFeature").AddTags("Exceptionless").Submit();
// Submit a 404
ExceptionlessClient.Default.SubmitNotFound("/somepage");
ExceptionlessClient.Default.CreateNotFound("/somepage").AddTags("Exceptionless").Submit();
// Submit a custom event type
ExceptionlessClient.Default.SubmitEvent(new Event { Message = "Low Fuel", Type = "racecar", Source = "Fuel System" });
```
## Manually Sending Errors
In addition to automatically sending all unhandled exceptions, you may want to manually send exceptions to the service. You can do so by importing the Exceptionless namespace and using code like this:
```csharp
try {
throw new ApplicationException(Guid.NewGuid().ToString());
} catch (Exception ex) {
ex.ToExceptionless().Submit();
}
```
## Sending Additional Information
You can easily include additional information in your error reports using our fluent event builder API.
```csharp
try {
throw new ApplicationException("Unable to create order from quote.");
} catch (Exception ex) {
ex.ToExceptionless()
// Set the reference id of the event so we can search for it later (reference:id).
// This will automatically be populated if you call ExceptionlessClient.Default.Configuration.UseReferenceIds();
.SetReferenceId(Guid.NewGuid().ToString("N"))
// Add the order object but exclude the credit number property.
.AddObject(order, "Order", excludedPropertyNames: new [] { "CreditCardNumber" }, maxDepth: 2)
// Set the quote number.
.SetProperty("Quote", 123)
// Add an order tag.
.AddTags("Order")
// Mark critical.
.MarkAsCritical()
// Set the coordinates of the end user.
.SetGeo(43.595089, -88.444602)
// Set the user id that is in our system and provide a friendly name.
.SetUserIdentity(user.Id, user.FullName)
// Set the users description of the error.
.SetUserDescription(user.EmailAddress, "I tried creating an order from my saved quote.")
// Submit the event.
.Submit();
}
```
## Modifying Unhandled Exception Reports
You can get notified, add additional information or ignore unhandled exceptions by wiring up to the `SubmittingEvent` event.
```csharp
// Wire up to this event in somewhere in your application's startup code.
ExceptionlessClient.Default.SubmittingEvent += OnSubmittingEvent;
private void OnSubmittingEvent(object sender, EventSubmittingEventArgs e) {
// Only handle unhandled exceptions.
if (!e.IsUnhandledError)
return;
// Ignore 404s
if (e.Event.IsNotFound()) {
e.Cancel = true;
return;
}
// Get the error object.
var error = e.Event.GetError();
if (error == null)
return;
// Ignore 401 (Unauthorized) and request validation errors.
if (error.Code == "401" || error.Type == "System.Web.HttpRequestValidationException") {
e.Cancel = true;
return;
}
// Ignore any exceptions that were not thrown by our code.
var handledNamespaces = new List { "Exceptionless" };
if (!error.StackTrace.Select(s => s.DeclaringNamespace).Distinct().Any(ns => handledNamespaces.Any(ns.Contains))) {
e.Cancel = true;
return;
}
// Add some additional data to the report.
e.Event.AddObject(order, "Order", excludedPropertyNames: new [] { "CreditCardNumber" }, maxDepth: 2);
e.Event.Tags.Add("Order");
e.Event.MarkAsCritical();
e.Event.SetUserIdentity(user.EmailAddress);
}
```
## Using NLog or Log4net Targets
Using major logging frameworks like NLog or Log4net gives you more granular control over what's logged.
To use the [NLog](https://www.nuget.org/packages/exceptionless.nlog) or [Log4net](https://www.nuget.org/packages/exceptionless.log4net) clients, bring down the NuGet package and follow the detailed readme. You can also take a look at our [sample app](https://github.com/exceptionless/Exceptionless.Net/tree/master/samples/Exceptionless.SampleConsole), which uses both frameworks.
**Performance Note**
If you are logging thousands of messages a minute, you should use the in-memory event storage (below). This way, the client won't serialize the log events to disk, thus is much faster. This does mean, however, that if the application dies you will lose unsent events in memory. When you use the NLog or Log4net targets and specify the API key as part of the target configuration, we will automatically create a second client instance that uses in-memory storage only for log messages. This way, any logged exceptions or feature usages still use disk storage, while log messages use in-memory storage, allowing maximum performance.
```csharp
using Exceptionless;
ExceptionlessClient.Default.Configuration.UseInMemoryStorage();
```
---
[Next > Supported Platforms](/docs/clients/dotnet/supported-platforms)
- [Express](https://exceptionless.com/docs/clients/javascript/guides/express/)
# Express
Perhaps the most popular NodeJS server-side framework, Express is used in thousands of projects. Exceptionless provides dedicated NodeJS support, and configuring your Exceptionless client in Express is easy.
### Install
To install exceptionless, you can use npm or yarn:
npm - `npm install @exceptionless/node`
yarn - `yarn add @exceptionless/node`
### Initializing the Client
Exceptionless provides a default singleton client instance. While we recommend
using the default client instance for most use cases, you can also create
custom instances (though that's beyond the scope of this guide).
```javascript
import { Exceptionless } from "@exceptionless/node";
await Exceptionless.startup((c) => {
c.apiKey = "YOUR API KEY";
});
```
You can see an additional parameter passed into the configuration object as an
example. To see all the available options, take a look at our
[configuration values here](/docs/clients/javascript/client-configuration-values).
### Using Exceptionless in a Express App
In this example, we're just making use of the Exceptionless client in a file
that handles one of our API routes. We will also show off how to handle errors
and 404s in Express.
```js
import { Exceptionless, KnownEventDataKeys } from "@exceptionless/node";
import express from "express";
await Exceptionless.startup((c) => {
c.apiKey = "YOUR API KEY";
});
const app = express();
app.get("/", async (req, res) => {
await Exceptionless.submitLog("Hello World!");
res.send("Hello World!");
});
app.use(async (err, req, res, next) => {
if (res.headersSent) {
return next(err);
}
await Exceptionless.createUnhandledException(err, "express").setContextProperty(KnownEventDataKeys.RequestInfo, req).submit();
res.status(500).send("Something broke!");
});
app.use(async (req, res) => {
await Exceptionless.createNotFound(req.originalUrl).setContextProperty(KnownEventDataKeys.RequestInfo, req).submit();
res.status(404).send("Sorry cant find that!");
});
const server = app.listen(3000, async () => {
var host = server.address().address;
var port = server.address().port;
var message = "Example app listening at http://" + host + port;
await Exceptionless.submitLog("app", message, "Info");
});
```
With that set up, you can use the Exceptionless client anywhere in your app.
- [Sending Events](https://exceptionless.com/docs/clients/javascript/sending-events/)
# Sending Events
Once configured, Exceptionless automatically sends unhandled exceptions that happen in your application. To send different event types, as well as customize the data that is sent, continue reading.
You can send us log messages, feature usages, or other kinds of events easily with our fluent api.
```js
import { Exceptionless } from "@exceptionless/browser";
await Exceptionless.submitLog('Logging made easy');
// You can also specify the log source and log level.
// We recommend specifying one of the following log levels: Trace, Debug, Info, Warn, Error
await Exceptionless.submitLog('app.logger', 'This is so easy', 'Info');
await Exceptionless.createLog('app.logger', 'This is so easy', 'Info').addTags('Exceptionless').submit();
// Submit feature usages
await Exceptionless.submitFeatureUsage('MyFeature');
await Exceptionless.createFeatureUsage('MyFeature').addTags('Exceptionless').submit();
// Submit a 404
await Exceptionless.submitNotFound('/somepage');
await Exceptionless.createNotFound('/somepage').addTags('Exceptionless').submit();
// Submit a custom event type
await Exceptionless.submitEvent({ message = 'Low Fuel', type = 'racecar', source = 'Fuel System' });
```
### Manually Sending Errors
In addition to automatically sending all unhandled exceptions, you may want to manually send exceptions to the service. You can do so by using code like this:
```javascript
import { Exceptionless } from "@exceptionless/browser";
try {
throw new Error('test');
} catch (error) {
await Exceptionless.submitException(error);
}
```
### Sending Additional Information
You can easily include additional information in your error reports using our fluent [event builder API](https://github.com/exceptionless/Exceptionless.JavaScript/blob/master/packages/core/src/EventBuilder.ts).
```javascript
import { Exceptionless } from "@exceptionless/node";
try {
throw new Error('Unable to create order from quote.');
} catch (error) {
await Exceptionless.createException(error)
// Set the reference id of the event so we can search for it later (reference:id).
// This will automatically be populated by default with a unique id;
.setReferenceId('random guid')
// Add the order object (the ability to exclude specific fields will be coming in a future version).
.setProperty("Order", order)
// Set the quote number.
.setProperty("Quote", 123)
// Add an order tag.
.addTags("Order")
// Mark critical.
.markAsCritical()
// Set the coordinates of the end user.
.setGeo(43.595089, -88.444602)
// Set the user id that is in our system and provide a friendly name.
.setUserIdentity(user.Id, user.FullName)
// Submit the event.
.submit();
}
```
---
[Next > Troubleshooting](/docs/clients/javascript/troubleshooting)
- [Supported Platforms](https://exceptionless.com/docs/clients/dotnet/supported-platforms/)
# Supported Platforms
## [Exceptionless](https://www.nuget.org/packages/Exceptionless/)
Exceptionless client for non-visual (ie. Console and Services) applications. Use this package if you are not using any other platform specific packages.
## [Exceptionless.Mvc](https://www.nuget.org/packages/Exceptionless.Mvc/)
Exceptionless client for ASP.NET MVC 3+ applications.
## [Exceptionless.WebApi](https://www.nuget.org/packages/Exceptionless.WebApi/)
Exceptionless client for ASP.NET Web API applications.
## [Exceptionless.Web](https://www.nuget.org/packages/Exceptionless.Web/)
Exceptionless client for ASP.NET WebForms applications.
## [Exceptionless.AspNetCore](https://www.nuget.org/packages/Exceptionless.AspNetCore/)
Exceptionless client for ASP.NET Core applications.
## [Exceptionless.Nancy](https://www.nuget.org/packages/Exceptionless.Nancy/)
Exceptionless client for [Nancy](http://nancyfx.org/) applications.
## [Exceptionless.Wpf](https://www.nuget.org/packages/Exceptionless.Wpf/)
Exceptionless client for WPF applications.
## [Exceptionless.Windows](https://www.nuget.org/packages/Exceptionless.Windows/)
Exceptionless client for Windows Forms applications.
## [Exceptionless.NLog](https://www.nuget.org/packages/Exceptionless.NLog/)
NLog target that sends log entries to Exceptionless.
## [Exceptionless.Log4net](https://www.nuget.org/packages/Exceptionless.Log4net/)
Log4net appender that sends log entries to Exceptionless.
## [Serilog.Sinks.ExceptionLess](https://www.nuget.org/packages/Serilog.Sinks.ExceptionLess/)
Serilog sink that sends log entries to Exceptionless.
---
[Next > Settings](/docs/clients/dotnet/settings)
- [More Guides](https://exceptionless.com/docs/clients/javascript/guides/more-guides/)
# More Guides
In addition to the quick start guides we've provided here, there are full app examples located in our Github repository. Take a look and feel free to let us know if you'd like to see other tutorials and guides included.
[JavaScript Example Repository](https://github.com/exceptionless/Exceptionless.JavaScript/blob/master/example)
[Next > Sending Events](/docs/clients/javascript/sending-events)
- [Troubleshooting](https://exceptionless.com/docs/clients/javascript/troubleshooting/)
# Troubleshooting
If your events aren't being sent to the server there are a few things that you can try to diagnose the issue.
## Update Your Client
Please make sure that you are using the latest version of the client.
## Ensure the Queue has Time to Process
If you are using Exceptionless in a scenario where an event is submitted and the process is immediately terminated, then you will need to make sure that the queue is processed before the application ends. Please note that the client will try to do this automatically.
Events are queued and sent in the background, if the application isn't running then the events cannot be sent. You can manually force the queue to be processed by calling the following line of code before before the process ends:
```js
import { Exceptionless } from "@exceptionless/browser";
await Exceptionless.processQueue();
```
This will cause the event queue to be processed asynchronously and the events to be reported. If this doesn’t solve the issue then please enable client logging and send us the log file. You can also attempt to pass true to `process(true)` to try and process the queue synchronously. _Please note that sending synchronously depends on specific api's that may not be available, so it may not send synchronously._
## Enable Client Logging
The Exceptionless client can be configured to write diagnostic messages to the console to help diagnose any issues with the client.
```js
import { Exceptionless } from "@exceptionless/browser";
await Exceptionless.startup(c => {
c.useDebugLogger();
});
```
## Check Your API Key
By design, an invalid API key provided to the Exceptionless client is not going to crash your application. Be sure to check the log outputs as this information will tell you if you have provided an invalid key.
## Debugging Source Code
You can also debug the Exceptionless source code by using the unmagnified version and set breakpoints in your browsers developer tools.
---
[Next > JavaScript Example](/docs/clients/javascript/javascript-example)
- [Settings](https://exceptionless.com/docs/clients/dotnet/settings/)
# Settings
- About
- Usage Example
- Typed Helpers
- Updating Client Configuration settings
- Subscribing to Client Configuration Setting changes
- Custom Config Settings
- Configuration file
- Attribute
- Adding Static Extended Data Values with Every Report
- Configuration file
- Code
- Adding Custom Tags with Every Report
- Configuration File
- Code
## About
[Read about client configuration and view in-depth examples](/docs/project-settings)
## Usage Example
The below example demonstrates **how we would turn on or off log event submissions at runtime** without redeploying the app or changing server config settings.
First, we add a (completely arbitrary for this example) `enableLogSubmission` client configuration value key with value `true` in the Project's Settings in the Exceptionless dashboard.

Then, we register a new client side plugin that runs each time an event is created. If our key (`enableLogSubmission`) is set to false and the event type is set to log, we will discard the event.
```csharp
ExceptionlessClient.Default.Configuration.AddPlugin("Conditionally cancel log submission", 100, context => {
var enableLogSubmission = context.Client.Configuration.Settings.GetBoolean("enableLogSubmission", true);
// only cancel event submission if it's a log event and enableLogSubmission is false
if (context.Event.Type == Event.KnownTypes.Log && !enableLogSubmission) {
context.Cancel = true;
}
});
```
## Typed Helpers
The `GetBoolean` method checks the `enableLogSubmission` key. This helper method makes it easy to consume saved client configuration values. The first parameter defines the settings key (name). The second parameter is optional and allows you to set a default value if the key doesn't exist in the settings or was unable to be converted to the proper type (e.g., a boolean).
We have a few helpers to convert string configuration values to different system types. These methods also contain overloads that allow you to specify default values.
- `GetString`
- `GetBoolean`
- `GetInt32`
- `GetInt64`
- `GetDouble`
- `GetDateTime`
- `GetDateTimeOffset`
- `GetGuid`
- `GetStringCollection` (breaks a comma delimited list into an IEnumerable of strings)
## Updating Client Configuration settings

All project settings are synced to the client in almost real time. When an event is submitted to Exceptionless we send down a response header with the current configuration version. If a newer version is available we will immediately retrieve and apply the latest configuration.
By default the client will check after `5 seconds` on client startup (*if no events are submitted on startup*) and then every `2 minutes` after the last event submission for updated configuration settings.
- Checking for updated settings doesn't count towards plan limits.
- Only the current configuration version is sent when checking for updated settings (no user information will ever be sent).
- If the settings haven't changed, then no settings will be retrieved.
You can also **turn off the automatic updating of configuration settings when idle** using the code below.
```csharp
ExceptionlessClient.Default.Configuration.UpdateSettingsWhenIdleInterval = TimeSpan.Zero;
```
You can also manually update the configuration settings using the code below.
```csharp
await Exceptionless.Configuration.SettingsManager.UpdateSettingsAsync(ExceptionlessClient.Default.Configuration);
```
## Subscribing to Client Configuration Setting changes
To be notified when client configuration settings change, subscribe to them using the below code.
```csharp
ExceptionlessClient.Default.Configuration.Settings.Changed += SettingsOnChanged;
private void SettingsOnChanged(object sender, ChangedEventArgs> args) {
Console.WriteLine("The key {0} was {1}", args.Item.Key, args.Action);
}
```
## Custom Config Settings
Exceptionless allows you to add custom config values to your Exceptionless clients that can be set through the client config section, attributes or remotely on the project settings. These config values can be accessed and used within your app to control things like wether or not to send custom data with your reports. For example, you could have a `IncludeOrderData` flag in your config that you use to control wether or not you add a custom order object to your Exceptionless report data. You can even remotely turn the setting on or off from your project settings. Here is an example of doing that:
### Configuration file
```csharp
```
### Attribute
```csharp
using Exceptionless.Configuration;
[assembly: ExceptionlessSetting("IncludeOrderData", "true")]
```
Then in your app, you can check the setting and determine if you should include the order data or not:
```csharp
using Exceptionless;
try {
...
} catch (Exception ex) {
var report = ex.ToExceptionless();
if (ExceptionlessClient.Default.Configuration.Settings["IncludeOrderData"] == "true")
report.AddObject(order);
report.Submit();
}
```
## Adding Static Extended Data Values with Every Report
You can have the Exceptionless client automatically add extended data values to every report that it submits like this:
### Configuration file
```csharp
```
### Code
```csharp
using Exceptionless;
ExceptionlessClient.Default.Configuration.DefaultData["Data1"] = "Exceptionless";
```
## Adding Custom Tags with Every Report
You can have the Exceptionless client automatically add specific tags to every report that it submits like this:
### Configuration File
```csharp
```
### Code
```csharp
using Exceptionless;
ExceptionlessClient.Default.Configuration.DefaultTags.Add("Tag1");
```
---
[Next > Plugins](/docs/clients/dotnet/plugins)
- [Plugins](https://exceptionless.com/docs/clients/dotnet/plugins/)
# Plugins
A plugin is a client-side add-in that is run **every time** you submit an event.
- Create a New Plugin
- Add System Uptime to Feature Usages
- Output
- Plugin Priority
- Adding the Plugin to Your App
- Removing an Existing Plugin
## Create a New Plugin
Specify a `System.Action<EventPluginContext>` or create a class that derives from [IEventPlugin](https://github.com/exceptionless/Exceptionless.Net/blob/master/src/Exceptionless/Plugins/IEventPlugin.cs) to create a plugin.
Every plugin is passed an [EventPluginContext](https://github.com/exceptionless/Exceptionless.Net/blob/master/src/Exceptionless/Plugins/EventPluginContext.cs), which contains all the valuable contextual information that your plugin may need via the following properties:
- Client
- Event
- ContextData
- Log
- Resolver
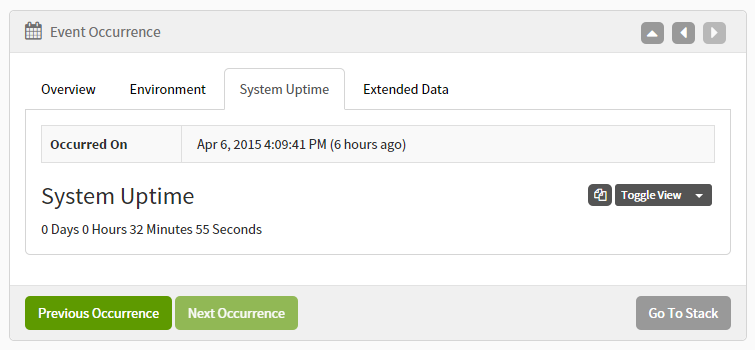
## Add System Uptime to Feature Usages
```csharp
using System;
using System.Diagnostics;
using Exceptionless.Plugins;
using Exceptionless.Models;
namespace Exceptionless.SampleConsole.Plugins {
[Priority(100)]
public class SystemUptimePlugin : IEventPlugin {
public void Run(EventPluginContext context) {
// Only update feature usage events.
if (context.Event.Type != Event.KnownTypes.FeatureUsage)
return;
// Get the system uptime
using (var pc = new PerformanceCounter("System", "System Up Time")) {
pc.NextValue();
var uptime = TimeSpan.FromSeconds(pc.NextValue());
// Store the system uptime as an extended property.
context.Event.SetProperty("System Uptime", String.Format("{0} Days {1} Hours {2} Minutes {3} Seconds", uptime.Days, uptime.Hours, uptime.Minutes, uptime.Seconds));
}
}
}
}
```
### Output
## Plugin Priority
The plugin priority determines the order the plugin runs (lowest to highest, then by order added). All plugins shipped with the client have a starting priority of 10 and increment by multiples of 10. For your addin to run first, give it a priority lower than 10 (e.g., 0-5). To have it run last, give it a priority higher than 100. **If a priority is not specified, it defaults to 0.**
## Adding the Plugin to Your App
Start by calling one of the `Exceptionless.ExceptionlessClient.Default.Configuration.AddPlugin()` overloads. This will typically be the following:
```csharp
using Exceptionless;
ExceptionlessClient.Default.Configuration.AddPlugin();
```
Passing a `System.Action<EventPluginContext>` to AddPlugin can also be used to add a plugin. _Note we specify a key so we can remove the plugin later. If you won't be removing the plugin, you can omit the first argument._
**AddPlugin is passed three arguments:**
- Unique Plugin Key (to remove later, if applicable)
- Priority
- Action (logic)
```csharp
using Exceptionless;
ExceptionlessClient.Default.Configuration.AddPlugin("system-uptime", 100, context => {
// Only update feature usage events.
if (context.Event.Type != Event.KnownTypes.FeatureUsage)
return;
// Get the system uptime
using (var pc = new PerformanceCounter("System", "System Up Time")) {
pc.NextValue();
var uptime = TimeSpan.FromSeconds(pc.NextValue());
// Store the system uptime as an extended property.
context.Event.SetProperty("System Uptime", String.Format("{0} Days {1} Hours {2} Minutes {3} Seconds", uptime.Days, uptime.Hours, uptime.Minutes, uptime.Seconds));
}
});
```
## Removing an Existing Plugin
Call one of the `Exceptionless.ExceptionlessClient.Default.Configuration.RemovePlugin` overloads to remove a plugin.
```csharp
using Exceptionless;
ExceptionlessClient.Default.Configuration.RemovePlugin();
```
If it was registered via an action, you have to remove it via the key you added it with.
```csharp
using Exceptionless;
ExceptionlessClient.Default.Configuration.RemovePlugin("system-uptime");
```
---
[Next > Private Information](/docs/clients/dotnet/private-information)
- [Private Information](https://exceptionless.com/docs/clients/dotnet/private-information/)
# Private Information
By default the Exceptionless Client will report all available metadata which could include potentially private data. There are various ways to limit the scope of data collection. For example, one could use [Data Exclusions](/docs/security) to remove sensitive values but it only applies to specific collection points such as `Cookie Keys`, `Form Data Keys`, `Query String Keys` and `Extra Exception properties`. Additional data may need to be removed like the collection of user names and IP Addresses. Shown below is several examples of how you can configure the client to remove this additional data.
You have the option of finely tuning what is collected via individual setting options or you can disable the collection of all private data by setting the `IncludePrivateInformation` to `false`.
## Configuration File
```xml
```
## Code
```csharp
ExceptionlessClient.Default.Configuration.IncludePrivateInformation = false;
```
If you wish to have a finer grained approach which allows you to use Data Exclusions while removing specific meta data collection you can do so via code. Please note if the below doesn't meet your needs you can always [write a plugin](/docs/clients/dotnet/plugins).
## Configuration
```csharp
// Include the username if available (E.G., Environment.UserName or IIdentity.Name)
ExceptionlessClient.Default.Configuration.IncludeUserName = false;
// Include the MachineName in MachineInfo.
ExceptionlessClient.Default.Configuration.IncludeMachineName = false;
// Include Ip Addresses in MachineInfo and RequestInfo.
ExceptionlessClient.Default.Configuration.IncludeIpAddress = false;
// Include Cookies, please note that DataExclusions are applied to all Cookie keys when enabled.
ExceptionlessClient.Default.Configuration.IncludeCookies = false;
// Include Form/POST Data, please note that DataExclusions are only applied to Form data keys when enabled.
ExceptionlessClient.Default.Configuration.IncludePostData = false;
// Include Query String information, please note that DataExclusions are applied to all Query String keys when enabled.
ExceptionlessClient.Default.Configuration.IncludeQueryString = false;
```
---
[Next > Troubleshooting](/docs/clients/dotnet/troubleshooting)
- [Troubleshooting](https://exceptionless.com/docs/clients/dotnet/troubleshooting/)
# Troubleshooting
If your events aren't being sent to the server there are a few things that you can try to diagnose the issue.
## Update Your Client
Please make sure that you are using the [latest version of the client](/docs/clients/dotnet/upgrading).
## Ensure the Queue has Time to Process
If you are using Exceptionless in a scenario where an event is submitted and the process is immediately terminated, then you will need to make sure that the queue is processed before the application ends. Please note that this will happen automatically if your runtime supports it _(portable profiles do not currently support this)_.
Events are queued to disk and sent in the background, if the application isn't running then the events cannot be sent. You can manually force the queue to be processed by calling the following line of code before before the process ends:
```csharp
await ExceptionlessClient.Default.ProcessQueueAsync();
```
This will cause the event queue to be processed synchronously and the events to be reported. If this doesn't solve the issue then please enable client logging and send us the log file.
## How to Locate the Default Isolated Storage Queue Folder
By default, Exceptionless stores errors in an isolated storage folder. You can find this folder using the 1st 8 characters of your API key. So if your API key is `a7aa250fce7e4e36a22a7031cf2337c8`, then you would search in the `C:\ProgramData\IsolatedStorage` folder for a folder named `a7aa250f`.
## Firewall / Proxy
If you are behind a proxy or firewall, please ensure that you can connect to and .
Your proxy settings should be picked up automatically by the Exceptionless client, but you can also try manually configuring the settings by adding a section to your app/web.config file.
::: info
Some clients may not support proxies. Proxies are not supported in Portable Class Libraries (PCL). If you are only using the `Exceptionless` portable class library package, then proxies will not work.**
:::
```xml
```
You also have the option of specifying the proxy in code by setting the `ExceptionlessClient.Configuration.Proxy` property.
## Enable Client Logging
The Exceptionless client can be configured to write diagnostic messages to a log file to help diagnose any issues with the client. You can enable logging via configuration using one of the following methods:
_Make sure you have write access to the file you specify for the log path._
## Configuration File
```csharp
```
## Code
```csharp
using Exceptionless;
ExceptionlessClient.Default.Configuration.UseFileLogger("C:\\exceptionless.log");
```
## Debugging Source Code
You can also debug the Exceptionless NuGet packages by configuring the Visual Studio source server integration. Please follow the [Symbol Source documentation](http://tripleemcoder.com/2015/10/04/moving-to-the-new-symbolsource-engine/) on configuring Visual Studio.
---
[Next > Upgrading](/docs/clients/dotnet/upgrading)
- [Upgrading](https://exceptionless.com/docs/clients/dotnet/upgrading/)
# Upgrading
- Upgrading from Exceptionless 5.x
- Upgrading from Exceptionless 4.x
- ProcessQueueAsync IAsyncDisposable pattern
- Upgrading from Exceptionless 3.x
- Upgrading from Exceptionless 2.x
## Upgrading from Exceptionless 5.x
We bumped the major version due to serialization changes we made under the hood.
We now only apply snake case naming strategy to known exceptionless models. Any
extra data like custom exception properties or user defined data is preserved
exactly as is. We also made changes to ensure that empty collections and
dictionaries are now serialized as they were previously excluded.
## Upgrading from Exceptionless 4.x
Here is a breakdown of the breaking changes in each package
- Exceptionless Package
- `ExceptionlessClient`
- renamed `UpdateUserEmailAndDescription` to `UpdateUserEmailAndDescriptionAsync` and made it async.
- removed `ProcessQueue`, replace this call with the async version `ProcessQueueAsync`.
- removed `ProcessQueueDeferred`, we recommend calling `ProcessQueueAsync` in `IAsyncDisposable` pattern. The section below contains more information.
- renamed `Shutdown` extension method to `ShutdownAsync` and made it async.
- renamed `SubmitSessionEnd` extension method to `SubmitSessionEndAsync` and made it async.
- renamed `SubmitSessionHeartbeat` extension method to `SubmitSessionHeartbeatAsync` and made it async.
- `SettingsManager`
- renamed `CheckVersion` to `CheckVersionAsync` and made it async.
- renamed `UpdateSettings` to `UpdateSettingsAsync` and made it async.
- `DefaultEventQueue`
- removed `Process`, replace this call with the async version `ProcessAsync`.
- `ProcessQueueScope`
- removed this class, we recommend calling `await client.ProcessQueueAsync` in `IAsyncDisposable` pattern. The section below contains more information.
- `ISubmissionClient`
- removed `PostEvents`, replace this call with the async version `PostEventsAsync`.
- removed `PostUserDescription`, replace this call with the async version `PostUserDescriptionAsync`.
- removed `GetSettings`, replace this call with the async version `GetSettingsAsync`.
- removed `SendHeartbeat`, replace this call with the async version `SendHeartbeatAsync`.
- Exceptionless.WebApi Package
- `ExceptionlessClient extension methods`
- renamed `UnregisterWebApi` to `UnregisterWebApiAsync` and made it async.
- Exceptionless.Windows Package
- `ExceptionlessClient extension methods`
- renamed `Unregister` to `UnregisterAsync` and made it async.
- Exceptionless.Wpf Package
- `ExceptionlessClient extension methods`
- renamed `Unregister` to `UnregisterAsync` and made it async.
### ProcessQueueAsync IAsyncDisposable pattern
We removed `ProcessQueueDeferred` as it was doing asynchronous work inside of a synchronous dispose. The following pattern solves this issue.
> We may introduce a this pattern in the core library at a later date targeting
> .NET Core, we just didn't want to take on extra package dependencies, of
> which could become a diamond dependency.
The change is pretty simple, just upgrade existing code calling `ProcessQueueDeferred`
```csharp
using var _ = client.ProcessQueueDeferred();
```
and replace it with the following:
```csharp
await using var _ = new ProcessQueueScope(client);
internal class ProcessQueueScope : IAsyncDisposable {
private readonly ExceptionlessClient _exceptionlessClient;
public ProcessQueueScope(ExceptionlessClient exceptionlessClient) {
_exceptionlessClient = exceptionlessClient;
}
public async ValueTask DisposeAsync() {
await _exceptionlessClient.ProcessQueueAsync();
}
}
```
We recommend creating a `ProcessQueueScope` as a reusable utility class and feel free to rename it!
## Upgrading from Exceptionless 3.x
- The `Exceptionless.Portable` package and `Exceptionless.Extras` assembly was merged into the `Exceptionless` package.
## Upgrading from Exceptionless 2.x
- `IEventEnrichment` has been renamed to `IEventPlugin`
- `IEventPlugin.Enrich(context, event)` signature has been changed to `IEventPlugin.Run(context)`. The event has been moved to the context
- `client.Configuration.AddEnrichment<IEventEnrichment>();` has been renamed to `client.Configuration.AddPlugin<IEventPlugin>();`
- `EventPluginContext.Data` property has been renamed to `EventPluginContext.ContextData`
- `EventSubmittingEventArgs.EnrichmentContextData` property has been renamed to `EventSubmittingEventArgs.PluginContextData`
---
[Next > JavaScript Client](/docs/clients/javascript/)
- [Overview](https://exceptionless.com/docs/)
# Index
The definition of the word exceptionless is: to be without exception. Exceptionless provides real-time error reporting for your JavaScript, Node, .NET Core, ASP.NET, Web API, WebForms, WPF, Console, and MVC apps. It organizes the gathered information into simple actionable data that will help your app become exceptionless!
Exceptionless focuses on real-time configurability which sets it apart from other error monitoring services. Where others might require a configuration change in your code and a re-deployment of your app, Exceptionless allows you to make changes without ever changing your deployed code.
---
## Who is using us?
Companies from around the world trust Exceptionless to help them deliver an improved experience for their customers.
 {.text-center}
## Want to Learn More?
Browse the news archive for release notes, engineering updates, and articles about error monitoring, .NET, JavaScript, and development.
---
## Ready to Dive in?
Let's jump right into the documentation and get you up and running. Navigate at your leisure on the left, or click through each section and read the entirety of our docs (if you're an over-achiever).
[Getting Started](/docs/getting-started)
- [API Usage](https://exceptionless.com/docs/api/)
# API Usage
Our [API](https://api.exceptionless.io) utilizes Swagger and Swashbuckle to automatically generate, update, and display documentation (which means it works without any work on your end when you are self-hosting). It is a great resource for our users that want to get their hands dirty and use Exceptionless data to roll their own tools, dashboards, etc.
To view the full API documentation, visit and click on the `API Documentation` link to be taken to the API documentation. With Swagger, you will have examples for all endpoints that include required parameters and potential responses.
---
[Next > Getting Started](/docs/api/api-getting-started)
- [Getting Started](https://exceptionless.com/docs/api/api-getting-started/)
# Getting Started
Remember, you can refer to the full, self-updating, documentation [here](https://api.exceptionless.io). But let's get started with some real examples to get you authenticated, which will allow access to other endpoints. Exceptionless protects your account by requiring authentication which takes the form of a `Bearer` Authorization header.
Before we generate a user-scoped token, let's talk a little bit about scopes.
## Authentication Scopes
When you eventually create an API Key/token for your project, you will need to pass in a scope (if you are creating this token programmatically). Exceptionless recognizes two scopes:
* user
* client
The `user` scope has full admin access to the account. This scope creates a token that can do everything from create projects to update billing info.
The `client` scope has access to post events, getting events, and reading the client configuration for a project.
## Get Your User Scoped Token
Before you can post project-specific events and make project-specific API requests, you'll need to first generate a user token which can then be used to generate tokens for your projects. It is incredibly important to protect user-scoped tokens as they act as the keys to the kingdom. **Never let anyone else access your user token**.
*NOTE: If you signed up using an OAuth flow with Google or something else, you will need to create a local login to be able to use this endpoint.*
Let's take a look at an example.
POST `/api/v2/auth/login`
```shell
curl --location --request POST "https://api.exceptionless.com/api/v2/auth/login" \
--header 'Content-Type: application/json' \
--data-raw '{
"email": YOUR_EMAIL,
"password": PASSWORD
}'
```
Your response should look like this:
```json
{
"token": "ojcQ1YVtKBnFITzJB3RFkdWRaVGdghHZoHvGKbx4"
}
```
Now that you have your token, you can get your project-specific API key (or token) which will allow you to execute API requests against a specific project. It's worth also noting that you can easily update your requests to authenticate via a URL query string and your access token.
For example, if we want to view our organizations, we simply navigate to , add the query string `?access_token={token}` rather than a Bearer token authorization header.
---
[Next > Getting Project Tokens](/docs/api/project-tokens)
- [Getting Events](https://exceptionless.com/docs/api/getting-events/)
# Getting Events
There may be times where you need to access the events you've sent through to Exceptionless without going through the Exceptionless UI. For those situations, you can use the API to fetch events. You can specify events across your organization or specific to a project. Let's take a look at the options.
*Note: organization-level requests require your [Scoped User Token](/docs/api/api-getting-started) while projects-specific requests can use your [Project Token](/docs/api/project-tokens).*
### Get Count of All Events
GET `api/v2/events/count`
```shell
curl --location --request GET "https://api.exceptionless.com/api/v2/events/count" \
--header 'Authorization: Bearer YOUR_SCOPED_USER_TOKEN'
```
The response will look like this:
```json
{
"total": 74
}
```
### Get Count of All Events For a Single Project
Remember, you can get your Project ID in the UI when logged in or by [following the instructions here](/docs/api/project-tokens#get-projects).
GET `api/v2/projects/YOUR_PROJECT_ID/events/count`
```shell
curl --location --request GET "https://api.exceptionless.com/api/v2/projects/YOUR_PROJECT_ID/events/count" \
--header 'Authorization: Bearer YOUR_PROJECT_TOKEN'
```
The response will be just like the global event search:
```json
{
"total": 74
}
```
### Get All Events For Organization
GET `api/v2/events`
```shell
curl --location --request GET 'https://api.exceptionless.com/api/v2/events' \
--header 'Authorization: Bearer YOUR_SCOPED_USER_TOKEN'
```
The default results returned will be paginated and limited to 10 results per page. However, you can configure the results limit and a bunch of other properties for your search through query string parameters. The full options [are listed here](https://api.exceptionless.io/docs/index.html).
Your response will look like this:
```json
[
{
"type": "string",
"source": "string",
"date": "2020-11-06T13:57:46.773Z",
"tags": [
"string"
],
"message": "string",
"geo": "string",
"value": 0,
"count": 0,
"data": {},
"referenceId": "string",
"id": "string",
"organizationId": "string",
"projectId": "string",
"stackId": "string",
"isFirstOccurrence": true,
"createdUtc": "2020-11-06T13:57:46.773Z",
"idx": {}
}
]
```
### Get All Events For a Project
Similar to getting all events or your organization, you can get all events for a project. You have the same query string filtering capabilities with this request, but we'll keep the example simple.
GET `api/v2/projects/YOUR_PROJECT_ID/events`
```shell
curl --location --request GET 'https://api.exceptionless.com/api/v2/projects/YOUR_PROJECT_ID/events' \
--header 'Authorization: Bearer YOUR_PROJECT_TOKEN'
```
Again, the response will look like this:
```json
[
{
"type": "string",
"source": "string",
"date": "2020-11-06T13:57:46.773Z",
"tags": [
"string"
],
"message": "string",
"geo": "string",
"value": 0,
"count": 0,
"data": {},
"referenceId": "string",
"id": "string",
"organizationId": "string",
"projectId": "string",
"stackId": "string",
"isFirstOccurrence": true,
"createdUtc": "2020-11-06T13:57:46.773Z",
"idx": {}
}
]
```
### Getting an Event by ID
You can get the details of a single event by passing in the ID for the event.
GET `api/v2/events/YOUR_EVENT_ID`
```shell
curl --location --request GET 'https://api.exceptionless.com/api/v2/events/YOUR_EVENT_ID' \
--header 'Authorization: Bearer YOUR_PROJECT_TOKEN'
```
The response will be a single object with the details of the event like this:
```json
{
"type": "string",
"source": "string",
"date": "2020-11-06T14:02:45.101Z",
"tags": [
"string"
],
"message": "string",
"geo": "string",
"value": 0,
"count": 0,
"data": {},
"referenceId": "string",
"id": "string",
"organizationId": "string",
"projectId": "string",
"stackId": "string",
"isFirstOccurrence": true,
"createdUtc": "2020-11-06T14:02:45.101Z",
"idx": {}
}
```
---
[Next > Clients](/docs/clients/)
- [Posting Events](https://exceptionless.com/docs/api/posting-events/)
# Posting Events
This is the meat of what Exceptionless does. This is what you care about. So, let's explore some of the possibilities.
Events passed through to Exceptionless take three forms:
- Posting Messages
- Posting Logs
- Posting Errors
We'll explore how to send through events for each category. First, it's important to remind you that you should not being user-scoped tokens for these API endpoints. If you have not yet generated a client-scoped token, [do so through the UI](/docs/project-settings) or [follow the guide here to do so programmatically here](/docs/api/project-tokens).
### Posting Messages
Messages are arbitrary pieces of information that can mean or relate to anything. They don't have to be errors or logs. Configuring a message event is simple.
POST `api/v2/events`
```shell
curl --location --request POST "https://api.exceptionless.com/api/v2/events" \
--header 'Authorization: Bearer YOUR_PROJECT_TOKEN' \
--header 'Content-Type: application/json' \
--data-raw '{ "message": "Exceptionless is amazing!" }'
```
You will receive a `202` response if the message was successfully posted. You can check out your Exceptionless dashboard to immediately see this message show up.
### Posting Logs
Logs will generally have a little more information associated with them than messages. Logs can take fields like date, message, and name. Let's take a look at an example.
POST `api/v2/events`
```shell
curl --location --request POST "https://api.exceptionless.com/api/v2/events" \
--header 'Authorization: Bearer YOUR_PROJECT_TOKEN' \
--header 'Content-Type: application/json' \
--data-raw '{ "type": "log", "message": "Exceptionless is amazing!", "date":"2030-01-01T12:00:00.0000000-05:00", "@user":{ "identity":"123456789", "name": "Test User" } }'
```
You will receive a `202` response if the log was successfully posted. You can check out your Exceptionless dashboard to immediately see this log show up.
### Posting Errors
Errors will generally be the most comprehensive events you send through to Exceptionless. They contain many details about the problems your users are facing. Let's take a look at the fields you'll need to provide and how to submit errors.
POST `api/v2/events`
```shell
curl --location --request POST "https://api.exceptionless.com/api/v2/events" \
--header 'Authorization: Bearer YOUR_PROJECT_TOKEN' \
--header 'Content-Type: application/json' \
--data-raw '{ "type": "error", "date":"2030-01-01T12:00:00.0000000-05:00", "@simple_error": { "message": "Simple Exception", "type": "System.Exception", "stack_trace": " at Client.Tests.ExceptionlessClientTests.CanSubmitSimpleException() in ExceptionlessClientTests.cs:line 77" } }'
```
With an error event, you will be able to explore additional details for your event through Exceptionless's dashboard. These additional details include the full stack trace if you provided it.
Next up, we'll take a look at how we fetch events.
---
[Next > Getting Events](/docs/api/getting-events)
- [Client-Scoped Tokens](https://exceptionless.com/docs/api/project-tokens/)
# Client-Scoped Tokens
You'll likely want your events associated with a specific project, and you may want to fetch data from a specific project. To ensure this, you need to generate a project-specific API key (or token). You can do this in the Exceptionless interface by clicking the All Projects link in the navigation header, then hover over the project name and click the gear icon. On the Settings page, you'll see a tab for API Keys. You can generate a token there.
However, you can programmatically generate these tokens as well. Let's use the [User Scoped Token](/docs/api/api-getting-started) you generated previously to get a list of projects.
### Get Projects
GET `api/v2/projects`
```shell
curl --location --request GET "https://api.exceptionless.com/api/v2/projects" \
--header 'Authorization: Bearer YOUR_USER_SCOPED_TOKEN'
```
The response to this request will be an array of all of your projects that looks like this:
```json
[
{
"id": "YOUR PROJECT ID",
"created_utc": "2016-01-11T20:05:59.7185672",
"organization_id": "YOUR ORG ID",
"organization_name": "YOUR ORG NAME",
"name": "YOUR PROJECT NAME",
"delete_bot_data_enabled": false,
"is_configured": true,
"stack_count": 0,
"event_count": 0,
"has_premium_features": true,
"has_slack_integration": false
}
]
```
You'll need the `id` field from this response to generate your new project-specific token. Let's generate that now. In addition to using the project ID, we will also need to pass in scopes for the token. In this case, we are going to pass in the `client` scope which provides access to post events and read events, but doesn't provide full user-token access. [Read more about scopes here](/docs/api/api-getting-started).
### Generate Client-Scoped Token
POST `api/v2/projects/PROJECT_ID`
```shell
curl --location --request POST "https://api.exceptionless.com/api/v2/projects/YOUR_PROJECT_ID/tokens" \
--header 'Authorization: Bearer YOUR_USER_SCOPED_TOKEN' \
--header 'Content-Type: application/json' \
--data-raw '{
"scopes": [
"client"
]
}'
```
The response you'll receive will look like this:
```json
{
"id": "TOKEN",
"organization_id": "YOUR_ORG_ID",
"project_id": "YOUR_PROJECT_ID",
"scopes": [
"client"
],
"is_disabled": false,
"created_utc": "2020-11-05T14:02:54.1866886Z",
"updated_utc": "2020-11-05T14:02:54.1867055Z"
}
```
This `TOKEN` can now be used as your API key in Bearer authorization headers for subsequent API requests related to your project.
---
[Next > Posting Events](/docs/api/posting-events)
- [Bulk Actions](https://exceptionless.com/docs/bulk-actions/)
# Bulk Actions
Bulk Actions is the ability to select multiple exceptions or occurrences of a single exception and do with them as you please, all at once. Simply select multiple occurrences, click the "Bulk Actions" button below the list, and choose your action.

## Watch the Video!

---
[Next > Project Settings](/docs/project-settings)
- [Clients](https://exceptionless.com/docs/clients/)
# Clients
- [.NET](/docs/clients/dotnet/)
- [JavaScript](/docs/clients/javascript/)
- [Custom Exceptionless Clients](https://exceptionless.com/docs/clients/custom-clients/)
# Custom Exceptionless Clients
Exceptionless provides a [.NET Client](/docs/clients/dotnet/) and a [JavaScript Client](/docs/clients/javascript/) to make things convenient. However, we recognize that developers write code in all sorts of languages beyond .NET and JS. It is possible to use Exceptionless with any programming language. In fact, our API makes it really simple. However, to get the full power of Exceptionless, you may want to create your own custom client in the language of your choice.
This guide will focus on the concepts necessary to successfully implement your custom client. Building a client in Exceptionless requires three main things:
1. Authentication
2. Understanding of the data models
3. Usage of the correct API endpoints
### Authentication
One of the key things to understand when creating a custom client (or when using the Exceptionless API) is the security implications of the API token generated and used. Exceptionless has two types of API tokens:
* User-scoped
* Client/Project-scoped
Think of a user-scoped key as the master key for that particular user. It allows for EVERYTHING. This includes password resets, deleting organizations, deleting users, and more. This is not the type of key you want to generate with your custom client. You also don't want to manually generate and use these types of keys within your client.
Instead, you should use a client-scoped key. A client-scoped key only has access to very specific endpoints and provides a significantly increased level of security compared to using a user-scoped key.
In the Exceptionless UI, you can create a project API key by going to a project's settings page. To do so, click on the project dropdown in the top-menu, hover over the project's name, and then click the gear icon. On the settings page, you'll see an API Keys tab. Click that and you can generate a new client-scoped key.

This is the key that will need to be passed into the configuration settings of your custom client.
### Understanding the Data Models
Exceptionless is designed to be as flexible as possible. In fact, you can send in almost any data you want with an event. We will display some pieces of data better than others, and if you make use of well-known keys, we can use those to make sure your events are stacked properly and displayed in a usable way within your dashboard.
However, before you can begin to throw any and everything at Exceptionless, it's important to understand the basic structure of an event. Let's take a look at the event model:
```json
{
"type": "error",
"source": "code.js line 655",
"reference_id": "123",
"message": "some event message",
"geo": "stringified lat and long values separated by a comma",
"date":"2030-01-01T12:00:00.0000000-05:00",
"value": 0,
"tags": ["string", "string", "string"],
"data": {},
}
```
Let's take each of these properties and explain them one-by-one.
#### type
The type property is an important one because it tells Exceptionless how to treat your event. Remember that Exceptionless is not just for errors. If you look at your Dashboard, you'll see categories like Exceptions, Logs, and Feature Usage. We group events into these categories for you based on the `type` value you pass in.
You can pass in any type value you'd like as long as it is a string value. However, we recommend the following type values:
* error
* log
* usage
* 404
* session
* sessionend
These values are pretty self-explanatory. If you have an error, use the `error` value, if you are logging an event, use `log`, and so on and so forth.
#### source
The source value should be a string representing where the error happened in your code. This usually comes from the error object in whatever programming language you are writing in. This should be a string value representing the error location.
#### reference_id
The reference id is an identifier you can pass in in order to use later. For example, if you know that you will have other events that reference this one, you can make use of the reference identifier you pass in. This identifier can be any unique string value. UUID is good option here, but as long as the value is unique, you'll be good to go.
#### message
The message can mean different things depending on the type of event you're passing through. If it's an error event, you may want to pick off the error message from the error object you receive, or you may want to create a custom error message. For a log event, you can simply pass in whatever message makes sense for the event.
Whatever message you send through, just make sure it is a string value.
#### geo
If you are capturing ip information, you may have location-based information. If so, and if you want to capture that alongside your events, you can pass that as a value for the `geo` property. This needs to be a string value, so you should pass in the longitude followed by a comma then the latitude.
#### value
The value property is an open-ended integer field that allows you capture additional information about your events. This could be number of ice cream scoops served before the event happened, it could be number of dogs walked, or any other arbitrary piece of information.
#### tags
The tags property is a string array of values you want to use to categorize your events. We have some built-in understanding of how certain tags should work. For example, events with a "critical" tag will be labels and handled as such in the interface.
The tags array takes string values only, and all tags will be visibile on the event details page.
#### data
This is the most flexible of the properties that you send into Exceptionless. It is a dictionary object containing key/value pairs of any bits of information you want. That said, there are some know keys that will help Exceptionless better display information in this data dictionary:
`@error` - this indicates to Exceptionless that the event is an error. We will handle the event as such.
`@simple_error` - this, like @error, indicates that the event is in an error. However, a simple error is less complex and the event object itself fits more neatly into what we've defined here so far.
`@request` - Events from a web server will have a request object. [Here is an example of how this data should be formed](https://github.com/exceptionless/Exceptionless.JavaScript/blob/master/packages/core/src/models/data/RequestInfo.ts).
`@environment` - This would be a string environment about your user's environment. [Here is an example of how that model should be formed](https://github.com/exceptionless/Exceptionless.JavaScript/blob/master/packages/core/src/models/data/EnvironmentInfo.ts).
`@user` - This is an object that can contain the following: `identity`: string value, `name`: string value, `data`: any value.
`@user_description` - This is an object that can contain the following: `email_address`: string value, `description`: string value, `data`: any value.
`@level` - This is designed for log events to represent the log level. It can also be used to prevent logs from being captured depending on your log level settings in Exceptionless.
`@submission_method` - Many apps have both global event listeners and specific areas where an event can be captured manually or ad hoc. To separate the submission methods of events, you can pass in whether an event was captured in a global listener, ad hoc, or however you want to describe the capturing of the event.
`@stack` - This is the stringified error stack for an exception.
When providing data to the Exceptionless server, there are specific data models dependent on the information you're trying to provide. We'll cover those models here.
### Using the API
When building your custom client, the consumers of your client will be calling methods you create, but you, of course, will be wiring up those methods to reach out to the Exceptionless API. The API is well-documented with auto-generating docs for each endpoint. To get started, you can take a look at our [API Usage docs here](/docs/api/).
### Wrapping Up
A custom client gives you full flexibility. While the two clients provided by Exceptionless do all of the above work for you, extending them would require forking the code. If you want extended capabilities or client support for additional programming languages, building a custom client might be the right move for you.
We can't way to see what you build.
- [.NET Client](https://exceptionless.com/docs/clients/dotnet/)
# .NET Client
Exceptionless provides a simple-to-use .NET client for your convenience. To get started, you'll need to install the client. There are a variety of ways to install, but for brevity we'll focus on the dotnet cli. If you don't have that installed, [follow the guide here](https://docs.microsoft.com/en-us/dotnet/core/sdk).
Exceptionless provides packages for specific platform (listed toward the bottom of this page), but to get started quickly, you can install the root version of Exceptionless like so:
`dotnet add package Exceptionless`
If you want to install a specific version, you can pass in the `--version` flag like this:
`dotnet add package Exceptionless --version 4.5.0`
For more specific packages for your particular target platform, we have provided the following packages:
## [Exceptionless.Mvc](https://www.nuget.org/packages/Exceptionless.Mvc/)
Exceptionless client for ASP.NET MVC 3+ applications.
## [Exceptionless.WebApi](https://www.nuget.org/packages/Exceptionless.WebApi/)
Exceptionless client for ASP.NET Web API applications.
## [Exceptionless.Web](https://www.nuget.org/packages/Exceptionless.Web/)
Exceptionless client for ASP.NET WebForms applications.
## [Exceptionless.AspNetCore](https://www.nuget.org/packages/Exceptionless.AspNetCore/)
Exceptionless client for ASP.NET Core applications.
## [Exceptionless.Nancy](https://www.nuget.org/packages/Exceptionless.Nancy/)
Exceptionless client for [Nancy](http://nancyfx.org/) applications.
## [Exceptionless.Wpf](https://www.nuget.org/packages/Exceptionless.Wpf/)
Exceptionless client for WPF applications.
## [Exceptionless.Windows](https://www.nuget.org/packages/Exceptionless.Windows/)
Exceptionless client for Windows Forms applications.
## [Exceptionless.NLog](https://www.nuget.org/packages/Exceptionless.NLog/)
NLog target that sends log entries to Exceptionless.
## [Exceptionless.Log4net](https://www.nuget.org/packages/Exceptionless.Log4net/)
Log4net appender that sends log entries to Exceptionless.
## [Serilog.Sinks.ExceptionLess](https://www.nuget.org/packages/Serilog.Sinks.ExceptionLess/)
Serilog sink that sends log entries to Exceptionless.
---
[Next > Platform Guides](/docs/clients/dotnet/guides/)
- [Console Apps Example](https://exceptionless.com/docs/clients/dotnet/guides/console-apps-example/)
# Console Apps Example
Exceptionless runs in all types of .NET aplications. Let's take a look at how to get started with Exceptionless in a console application. First, we'll some configuration out of the way.
To use Exceptionless, add the Exceptionless namespace like this: `using Exceptionless;`
Once you've done that, be sure to define the Exceptionless client:
`var client = new ExceptionlessClient("YOUR API KEY");`
Now you can send events to Exceptionless like this:
`client.SubmitLog("Hello World!");`
Or you can capture exceptions like this:
```csharp
try {
throw new Exception("MyApp error");
} catch (Exception ex) {
// submit the exception to the Exceptionless server
client.SubmitException(ex);
}
```
Because Exceptionless is designed to process events asynchronously in the background via a queue, you may need to make sure the event is processed before the app exits. If this is a requirement for your app, you can handle this situation by telling Exceptionless about it up front with `client.Startup();`, which means Exceptionless knows to force process any events in the queue before allowing the app to exit, or by calling `await client.ProcessQueueAsync();` before your application exists.
There's one additional configuration option that doesn't require defining the client first. If you use the Exceptionless default client, it takes care of of most things for you. Simply load up the Exceptionless default client by calling `Startup` with your API Key, and you're ready to go:
`ExceptionlessClient.Default.Startup("Your API Key");`
When you go this route, you can send exceptions to Exceptionless just by calling a `ToExceptionless()` method on the default Exceptionless client. It looks like this:
```csharp
// configure the default instance
ExceptionlessClient.Default.Startup("Your API Key");
try {
throw new Exception("MyApp ToExceptionless error");
} catch (Exception ex) {
// use ToExceptionless extension method. Uses ExceptionlessClient.Default and requires it to be configured.
ex.ToExceptionless().Submit();
// don't forget to call Submit.
}
```
Exceptionless supports a wide range of platforms. For a full list, see the [supported platforms page here](/docs/clients/dotnet/supported-platforms).
---
[Next > Web Server Example](/docs/clients/dotnet/guides/web-server-example)
- [Logging With Generic Host](https://exceptionless.com/docs/clients/dotnet/guides/logging-with-generic-host/)
# Logging With Generic Host
Microsoft provides a useful tool for logging events called `Microsoft.Extensions.Logging`. You can read up on [how logging works with .NET Core here](https://docs.microsoft.com/en-us/aspnet/core/fundamentals/logging/?view=aspnetcore-5.0), but we'll cover how to set up Exceptionless as a logging provider to be used as a generic host.
To get started, you'll need to make sure you update your `appsettings.json` file for your project. Here's an example configuration that will allow you to use Exceptionless with .NET Core's generic host:
```json
"Exceptionless": {
"ApiKey": "YOUR API KEY"
},
"Logging": {
"IncludeScopes": false,
"LogLevel": {
"Default": "Debug",
"System": "Information",
"Microsoft": "Information"
}
}
```
With that added, you can add the Exceptionless namespace to any file in your project with `using Exceptionless;`. This then allows you to utilize Exceptionless with dependency injection, or as we're covering here, as a generic host.
In your `Startup` method, you can read in your configuration file like this:
```csharp
var builder = new ConfigurationBuilder()
.SetBasePath(env.ContentRootPath)
.AddJsonFile("appsettings.json", optional: true, reloadOnChange: true)
.AddEnvironmentVariables();
Configuration = builder.Build();
```
This tells .NET Core to use whatever settings you've provided in the `appsettings.json` file for the logger (it also sets up some other configurations). To ensure Exceptionless is used for logging, you will need to update the `ConfigureServices` method to this:
```csharp
services.AddLogging(b => b
.AddConfiguration(Configuration.GetSection("Logging"))
.AddDebug()
.AddConsole()
.AddExceptionless());
```
This is adding debugging capabilities, console logging, and Exceptionless to your generic host logging configuration.
If you are using a generic host in a web server application, you may want to capture more information about HTTP requests automatically. To do this, you'll need to edit the `ConfigureServices` method to include the following line:
`services.AddHttpContextAccessor();`
Finally, you'll need to tell the app itself to use Exceptionless. You can do this in your `Configure` method liket his:
`app.useExceptionless(Configuration);`
Now, you have access to send logs, exceptions, and messages to Exceptionless automatically through the generic host configuration. If you'd like to see a full, detailed example, [we have that here](https://github.com/exceptionless/Exceptionless.Net/blob/9e91a51c36d03fcc3bee79a8b6eaee3034ac78b4/samples/Exceptionless.SampleAspNetCore/Startup.cs).
### Exceptionless Configuration Options
One of the nice things about configuring Exceptionless through `appsettings.json` is you can set up some defaults that will apply to all events sent through to Exceptionless. Let's explore what that might look like. In your `appsettings.json` file, you can add the following to your `Exceptionless` property:
```json
"DefaultData": {
"JSON_OBJECT": "{ \"Name\": \"John Doe\" }",
"Boolean": true,
"Number": 1,
"Array": "1,2,3"
}
```
This is a very simple object that encapsulates default data that will be sent to Exceptionless with every event. The `DefaultData` property can take in any property keys you'd like to pass in. The property values must be strings, booleans, numbers, or arrays. As you can see in the example, a JSON object can simply be stringified.
In addition to the `DefaultData` property, you can include `DefaultTags` and `Settings`. To include `DefaultTags`, add the following:
```json
"DefaultTags": [ "MySpecialTag" ]
```
As you can probably tell, you can pass in as many tags as you'd like as an array of strings.
To add custom settings, you would do something like this:
```json
"Settings": {
"FeatureXYZEnabled": false
}
```
The `Settings` property can take any keys you'd like. The values associated with those keys must be strings, numbers, or booleans.
You can, of course, customize the default logging, but that is outside the Exceptionless configuration. If you'd like to customize the way things are logged when using the generic host, [follow this guide](https://docs.microsoft.com/en-us/aspnet/core/fundamentals/logging/?view=aspnetcore-5.0#configure-logging).
---
[Next > Sending Events](/docs/clients/dotnet/sending-events)
- [Web Server Example](https://exceptionless.com/docs/clients/dotnet/guides/web-server-example/)
# Web Server Example
Exceptionless runs great in all sorts of environments. Let's take a look at how you might set up Exceptionless to work with your .NET web server.
To get started, be sure to include the Exceptionless namespace wherever you plan to use it. You can do that like this: `using Exceptionless;`
The simplest example of using Exceptionless in your web server is to include a try/catch block that leverages Exceptionless in the catch. It might look something like this:
```csharp
[HttpGet("{id}")]
public ActionResult GetUser(string id)
{
try {
var user = userService.GetUser(id);
return Ok(user);
} catch (Exception ex) {
ex.ToExceptionless().SetProperty("UserId", id).Submit();
return NotFound();
}
}
```
Should the request to `FetchUser()`, or whatever your method is, happen to throw, the Exceptionless client will pick it up and send the exception to your dashboard.
Of course, Exceptionless is more than just error handling. You can leverage any of the Exceptionless event methods [documented here](/docs/clients/dotnet/sending-events) through the client interface.
Register Exceptionless with your ASP.NET Core application builder, then enable the exception handler and Exceptionless middleware:
```csharp
var builder = WebApplication.CreateBuilder(args);
builder.AddExceptionless();
builder.Services.AddProblemDetails();
var app = builder.Build();
app.UseExceptionHandler();
app.UseExceptionless();
```
`AddExceptionless` reads the `Exceptionless` settings from the application configuration and registers the services needed to capture unhandled exceptions and request information. Configure those settings in `appsettings.json`:
```json
"Exceptionless": {
"ApiKey": "YOUR API KEY",
"ServerUrl": "http://localhost:5200",
"DefaultData": {
"JSON_OBJECT": "{ \"Name\": \"Alice\" }",
"Boolean": true,
"Number": 1,
"Array": "1,2,3"
},
"DefaultTags": [ "SOME_TAG" ],
"Settings": {
"FeatureXYZEnabled": false
}
},
```
You will only pass in the `ServerUrl` if you are self-hosting Exceptionless. You'll use this to point to your correct URL. The `DefaultData` is metadata you'd like associated with every event you send to Exceptionless.
With this configured, you can now call the Exceptionless client from anywhere in your server application without first defining the client.
This is just one example of one platform Exceptionless supports. But Exceptionless supports a wide range of platforms. For a full list, see the [supported platforms page here](/docs/clients/dotnet/supported-platforms).
---
[Next > Logging With Generic Host](/docs/clients/dotnet/guides/logging-with-generic-host)
- [JavaScript Client](https://exceptionless.com/docs/clients/javascript/)
# JavaScript Client
The Exceptionless JavaScript client SDK makes it easy to report errors, log details, track feature usage and more. Be sure you have an Exceptionless account (you can sign up here) or that you are self-hosting a running instance of Exceptionless.
---
Full guides can be found below:
* [React](/docs/clients/javascript/guides/react)
* [Vue](/docs/clients/javascript/guides/vue)
* [Angular](/docs/clients/javascript/guides/angular)
* [Node](/docs/clients/javascript/node-example)
* [Express](/docs/clients/javascript/guides/express)
---
This quickstart focuses on the vanilla JavaScript implementation of Exceptionless.
## npm
To install with npm, run: `npm install @exceptionless/browser`
Next, you just need to call startup during your apps startup to automatically capture unhandled errors.
```js
import { Exceptionless } from "@exceptionless/browser";
await Exceptionless.startup("API KEY HERE");
try {
throw new Error("test");
} catch (error) {
await Exceptionless.submitException(error);
}
```
## CDN
To install via a script tag referencing Exceptionless over a CDN, add the following before your closing `` tag and call startup like so:
```html
``
```
## Production stack traces
Production bundles are often minified, which makes their stack traces difficult to read and group. Exceptionless can automatically discover public source maps or accept private source maps from your CI/CD pipeline. See [JavaScript Source Maps](/docs/source-maps) for setup and upload instructions.
---
[Next > Configuration](/docs/clients/javascript/client-configuration)
- [Express Example](https://exceptionless.com/docs/clients/javascript/express-example/)
# Express Example
Add Exceptionless to your Express.js project and start collecting unhandled errors and 404s quickly.
To start, just add the following middleware to the bottom of your middleware definitions.
```js
import { Exceptionless } from "@exceptionless/node";
// This middleware processes any unhandled errors that may occur in your middleware.
app.use(async (err, req, res, next) => {
if (res.headersSent) {
return next(err)
}
await Exceptionless.createUnhandledException(err, "express")
.addRequestInfo(req)
.submit();
res.status(500).send("Something broke!");
});
// This middleware processes 404’s.
app.use(async (req, res) => {
await Exceptionless.createNotFound(req.originalUrl).addRequestInfo(req).submit();
res.status(404).send("Sorry cant find that!");
});
```
## Sample Express.js App
We have built a quick [Express.js sample app](https://github.com/exceptionless/Exceptionless.JavaScript/blob/master/example/express/app.js) you can play around with.
**Run the sample app by following the steps below:**
1. Install [Node.js](https://nodejs.org/)
2. [Clone or download our repository from GitHub](https://github.com/exceptionless/Exceptionless.JavaScript).
3. Run `npm install`. This steps is required because we reference the exceptionless package from the root dist folder.
4. Navigate to the `example\express` folder via the command line (e.g., cd example\express)
5. Open app.js in your favorite text editor and set the [`apiKey`](https://github.com/exceptionless/Exceptionless.JavaScript/blob/master/example/express/app.js#L7). You may need to remove the `serverUrl` setting if you are not self hosting.
6. Run node app.js.
7. Navigate to in your browser to view the express app.
8. To create an error, navigate to
### Troubleshooting
We recommend enabling debug logging by calling `Exceptionless.config.useDebugLogger();`. This will output messages to the console regarding what the client is doing. Please contact us by creating an issue on GitHub if you need assistance or have any feedback for the project.
---
[Next > Angular Example](/docs/clients/javascript/react-example)
- [JavaScript Example](https://exceptionless.com/docs/clients/javascript/javascript-example/)
# JavaScript Example
We have put together an example for a few JavaScript-based frameworks and the browser to help you get started. You can find those [here in the GitHub Repo](https://github.com/exceptionless/Exceptionless.JavaScript/tree/master/example). You can clone the repository and run the code as is or you can use the repository example as a starting point.
For framework specific details, continue on to the next page or select a specific framework on the left.
---
[Next > React Example](/docs/clients/javascript/react-example)
- [Node.js Example](https://exceptionless.com/docs/clients/javascript/node-example/)
# Node.js Example
Here is a very simple example using a Node.js script.
```js
import { Exceptionless } from "@exceptionless/node";
await Exceptionless.startup("YOUR API KEY");
const forceError = async () => {
try {
throw new Error("Whoops, I did it again.")
} catch(e) {
await Exceptionless.submitException(e);
}
}
```
---
[Next > Express Example](/docs/clients/javascript/express-example) {.text-right }
- [React Example](https://exceptionless.com/docs/clients/javascript/react-example/)
# React Example
The React Client from Exceptionless includes all of the functionality from the browser client, but with some extra React-specific helpers.
The one thing you'll specifically notice in the React client is the addition of an `ExceptionlessErrorBoundary` class component. This is a wrapper component that can be used to ensure all errors in the presentational layer of your app are reported.
It works exactly as Error Boundaries in React work, but it's pre-wired to report to Exceptionless. Here's a very simple example:
```js
import React from 'react';
import ReactDOM from 'react-dom';
import './index.css';
import App from './App';
import reportWebVitals from './reportWebVitals';
import {
Exceptionless,
ExceptionlessErrorBoundary
} from "@exceptionless/react";
import ErrorBoundary from './ErrorBoundary';
const startExceptionless = async () => {
await Exceptionless.startup((c) => {
c.apiKey = "YOUR API KEY";
c.useDebugLogger();
c.defaultTags.push("Example", "React");
});
};
startExceptionless();
ReactDOM.render(
,
document.getElementById('root')
);
reportWebVitals();
```
As you can see, we wrap the root `App` component first in the `ExceptionlessErrorBoundary` and then if you want to present your own fallback UI, you can create a custom `ErrorBoundary` component that will make sure that UI is served.
We have a detailed blog post about this here.
[The full example / sample can be found here](https://github.com/exceptionless/Exceptionless.JavaScript/tree/master/example/react).
---
[Next > Node.js Example](/docs/clients/javascript/node-example) {.text-right }
- [Vue Example](https://exceptionless.com/docs/clients/javascript/vue-example/)
# Vue Example
[Example / Sample can be found here](https://github.com/exceptionless/Exceptionless.JavaScript/tree/master/example/vue).
---
[Next > Self-Hosting](/docs/self-hosting/)
- [Comparison](https://exceptionless.com/docs/comparison/)
# Comparison
| Feature | Exceptionless | Application Insights | Elmah | Raygun |
| :----------------------------- | :-----------: | :------------------: | :---: | :----: |
| Open Source | X | | X | |
| Free Self Hosting | X | | X | |
| Detailed error reports | X | X | | X |
| Email Notifications | X | X | X | X |
| Export Events | | X | X | |
| Filtering | X | X | | X |
| Send Custom Data [^1] | X | | | X |
| Real-time Client Configuration | X | | | |
| Real-time Dashboards | X | | | |
| Complete Rest API | X | | | |
| Search | X | X | | X |
| Search Custom Fields | X | | | |
| Intelligent Stacking | X | X | | X |
| Custom Stacking | X | | | X |
| Mark Fixed | X | | | X |
| Mark Hidden | X | | | X |
| Comment on Events | | | | X |
| Support Multiple Platforms | X | X | | X |
| User Sessions [^2] | X | | | X |
| User % [^3] | X | | | ? |
| Broken Links | X | X | X | X |
| Releases | | | | X |
| Feature Usages | X | | | |
| Log Messages | X | | | |
| Custom Event Types | X | X | | |
| Webhooks | X | X | | X |
- **X** = has feature, **empty box** does not have feature, **?** = unknown
[^1]: Send custom data on any event and promote it to a first class tab.
[^2]: Automatically tracks users sessions. Please note that this is a paid add on for Raygun Pulse (**$149/mo**).
[^3]: Ability to see how many users are affected by an error or are using a specific feature.
---
[Next > Security](/docs/security)
- [Event De-Duplication](https://exceptionless.com/docs/deduplication/)
# Event De-Duplication
Have you ever run into an error where the event that triggers the error happens rapidly in a short amount of time? Infinite loops combined with errors? Ugh. If that happens, we don't think you should have to worry about your event quotas and plan limits.
That's why we built automatic de-duplication.
If we get two events that are exactly the same within a minute, we send the first, cancel the second and hold onto it for 60 seconds. If that same exact event comes in again, we cancel it and increment the count on the one we were holding. Once 60 seconds is released we submit that event and now you get a sampling of events during that period with the exact account that occurred. We only do this if the event is an exactly the same minus date occurred.
---
[Next > Integrations](/docs/integrations)
- [FAQ](https://exceptionless.com/docs/FAQ/)
# FAQ
- Will Exceptionless slow my application down?
- Why is my organization throttled?
- What happens if the organization plan limit is reached?
- What will happen if my application throws a bunch of exceptions in a very short amount of time?
- Can I reset my event data?
- What happens if my internet connection goes down?
- How can I disable event reporting during testing?
- Is there a minimum version of .NET you need to be targeting to use the Exceptionless client.
- Can I use Exceptionless under medium trust?
***
## Will Exceptionless slow my application down?
Exceptionless queues all events submissions to an in memory queue and then processes them in a background thread. We do everything we can to make sure that we do not slow your app down or crash your app.
***
## Why is my organization throttled?
Every plan has both a monthly limit as well as an hourly limit. The hourly limit resets every hour and is [calculated](https://github.com/exceptionless/Exceptionless/blob/master/src/Exceptionless.Core/Extensions/OrganizationExtensions.cs#L51-L65) based on the remaining event limit divided by the number of hours left in the month times 10. We do this to prevent your event limit from being reached in seconds or minutes, thus giving you a greater sample size. _The limit can be increased at any time by upgrading the plan which boosts the monthly limit as well as hourly limit._
***
## What happens if the organization plan limit is reached?
When the organization is throttled (hourly limit) or the plan limit (monthly limit) is reached, the clients will automatically discard any submitted events for a short period of time (usually five minutes) and resume automatically. Your app will continue to work as expected this entire time. _The limit can be increased at any time by upgrading the plan which boosts the monthly limit as well as hourly limit._
***
## What will happen if my application throws a bunch of exceptions in a very short amount of time?
Exceptionless will intelligently try to ensure that the right amount of data is sent in. First, the client will intelligently ensure that the same event occurrence isn't submitted repeatedly. Lets assume you have ten of the exact events submitted over a period of a minute. The first one comes through as expected, the next 9 events will be rolled up into a single event with a counter and last occurred date and submitted at the end of the 60 seconds. This allows us to show you a total of how many times the event occurred. Finally, in some cases the server logic will step in to remove error occurrences that it feels are spam. For example: Your site might be scanned by a bot and throw a bunch of unique 404 errors. Our system will see all of these within a small window of time submitted by a specific IP address. Once it hits a configurable threshold of error occurrences within a specific amount of time, these error occurrences will be removed from the system.
***
## Can I reset my event data?
You can reset your event data at the project level by going into the manage project page and clicking the Reset Project Data button. You can also delete all event data for a specific stack by going to the stack page, clicking the Options button and clicking Delete. _Please note that this will not reset any plan limits._
***
## What happens if my internet connection goes down?
If persistent storage is configured, the Exceptionless client will queue all events submissions to disk and will retry them later.
***
## How can I disable event reporting during testing?
Set the enabled attribute to false in the exceptionless config section.
***
## Is there a minimum version of .NET you need to be targeting to use the Exceptionless client.
Yes, your application needs to be targeting .NET 4.5 or newer.
***
## Can I use Exceptionless under medium trust?
Yes, you will need to set the requirePermission attribute to false in the exceptionless config section. This attribute allows the exceptionless client to read the exceptionless config settings. When you are running in medium trust, unhandled exceptions will not be caught. This means that you must submit exceptions to Exceptionless manually.
---
[Next > Comparison](/docs/comparison)
- [Filtering & Searching](https://exceptionless.com/docs/filtering-and-searching/)
# Filtering & Searching
- Filter by Organization \& Project
- Filter by Time Frame
- Filter / Search by Specific Criteria
- Searchable Fields \& Requirements
- Multiple Queries
- Wild Cards
- Exclusions
- Set and Unset Fields
- Ranges
- Custom Extended Data
- Demo Video
## Filter by Organization & Project
The dashboard loads up with all projects selected by default.
Click on the “All Projects” drop down in the top left of the dashboard and select your organization or project to filter the data to your liking.

## Filter by Time Frame
Click on the calendar icon in the header to select from multiple preset time frame filters, or click "Custom" and select your own.

## Filter / Search by Specific Criteria
Click the magnifying glass to search by specific criteria.
You can filter by tag, ID, organization, project, stack, type, value, IP, architecture, user, and much more.
Some searches, such as ID, require a prefix (“id:”) on the search, but others, such as error.message, can be entered as strings (“A NullReferenceException occurred”).
View a complete list of searchable terms, examples, and FAQs below.

## Searchable Fields & Requirements
| TERM | EXAMPLE | FIELD REQUIRED? (field:term) | DESCRIPTION |
| ------------------ | -------------------------------------------------------------------------------------------------------------------- | ---------------------------- | --------------------------------------------- |
| `*` | `*` | false | Shows all events (including hidden and fixed) |
| id | `id:54d8315ce6bb2d0500bcc7b4` | true | Documents id |
| organization | `organization:54d8315ce6bb2d0500bcc7b4` | true | Organization id |
| project | `project:54d8315ce6bb2d0500bcc7b4` | true | Project id |
| stack | `stack:54d8315ce6bb2d0500bcc7b4` | true | Stack id |
| reference | `reference:12345678` | true | Reference id |
| session | `session:12345678` | true | Session id |
| type | `type:error` | true | Event type |
| source | `source:"my log source"` or `"my log source"` | false | Event source |
| level | `level:Error` | true | Log level |
| date | `date:"2020-10-16T12:00:00.000"` | true | Occurrence date |
| first | `first:true` | true | True if first occurrence of event |
| message | `message:"My error message"` or `"My error message"` | false | Event message |
| tag | `tag:"Blake Niemyjski"` or `tag:Blake` or `blake` | false | Tags |
| value | `value:1` | true | Value of event (used in charts) |
| geo | `geo:75044~75mi` or `geo:[geohash1..geohash2]` | true | Geo Location |
| status | `status:open` or `status:discarded` or `status:fixed` or `status:regressed` or `status:snoozed` or `status:ignored` | true | Stack status |
| version | `version:1` or `version:1.0` or `version:1.0.0` | true | Application version |
| machine | `machine:Server` or `Server` | false | Machine name |
| ip | `ip:127.0.0.1` or `127.0.0.1` | false | IP address |
| architecture | `architecture:x64` | true | Machine architecture |
| useragent | `useragent:IE` or `useragent:"Mozilla/5.0"` | true | User Agent |
| path | `path:"/cart"` or `"/cart"` | false | URL path |
| browser | `browser:Chrome` | true | Browser |
| browser.version | `browser.version:50.0` | true | Browser version |
| browser.major | `browser.major:50` | true | Browser major version |
| device | `device:iPhone` | true | Device |
| os | `os:iOS` | true | Operating System |
| os.version | `os.version:8.0` | true | Operating System version |
| os.major | `os.major:8` | true | Operating System major version |
| bot | `bot:true` | true | bot |
| error.code | `error.code:500` or `500` | false | Error code |
| error.message | `error.message:"A NullReferenceException occurred"` or `"A NullReferenceException occurred"` | false | Error message |
| error.type | `error.type:"System.NullReferenceException"` or `"System.NullReferenceException"` | false | Error type |
| error.targettype | `error.targettype:"System.NullReferenceException"` or `"System.NullReferenceException"` | false | Error target type |
| error.targetmethod | `error.targetmethod:AssociateWithCurrentThread` or `AssociateWithCurrentThread` | false | Error target method |
| user | `user:"random user identifier"` or `"random user identifier"` | false | Uniquely identifies user |
| user.name | `user:"Exceptionless User"` or `"Exceptionless User"` | false | Friendly name of user |
| user.description | `user.description:"I clicked the button"` or `"I clicked the button"` | false | User Description |
| user.email | `user.email:"support@exceptionless.io"` or `"support@exceptionless.io"` | false | User Email Address |
## Multiple Queries
All queries separated by a space will be an `AND` operation. If you wish to `OR` queries you’ll need to use an `OR` statement. We recommend wrapping conditional statements with parentheses.
**Example:** Lets assume we want to return all events that have a `blue` or `red` tag. To search for these events our query would be `(tag:blue OR tag:red)`.
## Wild Cards
Suffix your query with `*` for wild card searches.
## Exclusions
Prefix the field name with `-` for exclusions.
**Example:** Lets assume that we want to return all events that are not marked as a bot. To search for these events our query would be `-bot:true`.
*NOTE: In some cases searching with `-bot:true` is more accurate than searching with `bot:false`. This happens because the first query returns all records where `bot` field is `not set` or `not equal to true`. The second query returns results only where the `bot` field is set to `false`.
## Set and Unset Fields
Prefix the field name with `_missing_` or `_exists_`.
**Example:** Lets assume that we want to return all events that do not contain any tags. To search for these events our query would be `_missing_:tag`.
## Ranges
Specify a `date` or `numeric` range as part of the term.
**Date Range Example:** Lets assume that we want to return all events that occurred in 2020. To search for these events our query would be `date:[2020-01-01 TO 2020-12-31]`.
**Numeric Range Example:** Lets assume that we want to return all events that contain contain a `value` between 1 and 10. To search for these events our query would be `value:(>0 AND <=10)`.
## Custom Extended Data
All simple data types (`string`, `boolean`, `date`, `number`) that are stored in extended data will be indexed. _NOTE_: Field names will be lowercased and escaped. Any field name that is not a valid identifier (containing only letter and digits) or is longer than 25 characters will be ignored.
**Example:** Lets assume that our events extended data contains a property called `Age` with a value of `18`. To search for this value our query would be `data.age:18`.
***
## Demo Video
---
[Next > Bulk Actions](/docs/bulk-actions)
- [Getting Started](https://exceptionless.com/docs/getting-started/)
# Getting Started
Exceptionless provides you the tools to track errors, logs, and events while guiding you toward actionable solutions. To get started, you'll want to decide if you are self-hosting Exceptionless or using our hosted version. If you choose to use our hosted version, you can get started for free.
## Hosted Option
1. [Create an account](https://be.exceptionless.io/signup)
2. When you sign-up, you will be prompted to create your first project.
3. [Configure your application](https://be.exceptionless.io/project/list) by clicking the Download & Configure Client action button on the project list page.
4. Select your project type and follow the instructions.
5. Your application will now automatically send all unhandled errors to the Exceptionless service.
6. You can also send handled errors, feature usage or log messages along with additional information ([see documentation for your specific client](/docs/clients/)).
## Self-Hosted Option
We have put together comprehensive documentation to help you get started with a self-hosted Exceptionless instance. You can [find that documentation here](/docs/self-hosting/).
## Sending Your First Event
Once you've singed up for an account and created a project, you can start receiving events. Let's take a look at sending a simple event to Exceptionless.
POST `api/v2/events`
```shell
curl --location --request POST "https://api.exceptionless.com/api/v2/events" \
--header 'Authorization: Bearer YOUR_PROJECT_TOKEN' \
--header 'Content-Type: application/json' \
--data-raw '{ "type": "error", "date":"2030-01-01T12:00:00.0000000-05:00", "@simple_error": { "message": "Simple Exception", "type": "System.Exception", "stack_trace": " at Client.Tests.ExceptionlessClientTests.CanSubmitSimpleException() in ExceptionlessClientTests.cs:line 77" } }'
```
---
You've got your account created, now what? Let's get a better understanding of how you manage events in Exceptionless and then we can dive into some best practice and ways to enhance your use.
---
[Next > Managing Stacks](/docs/managing-stacks)
- [Integrations](https://exceptionless.com/docs/integrations/)
# Integrations
To make managing events from your application easier, Exceptionless provides some useful integrations. You can access these integrations by clicking the Project dropdown menu, clicking the settings icon next to the project name, then clicking on the Integrations tab on the Settings page.

We provide three integrations:
1. Zapier
2. Slack
3. Webhooks
## Zapier
Exceptionless has built a [first-class Zapier application](https://zapier.com/apps/exceptionless/integrations) that allows you to connect your Exceptionless account to over 3,000 other apps. To use this, simply sign into your Zapier account and search for Exceptionless.

## Slack
Connecting to Slack is as simple as clicking the Slack integration button. You'll be prompted to sign into your Slack workspace. Once signed in, you can choose the channel for your notifications to be sent to. Then, back on the Settings page, you can configure what types of notifications are sent.

## Webhooks
By configuring a webhook, you are telling Exceptionless to post data to the specified endpoint whenever specific events happen. This is useful in creating custom, bespoke integrations for your Exceptionless account. Configuring a webhook is simple. Click the Add Webhook button on the Settins page and provide the information requested in the modal.

Here's an example of the event payload (this applies to v2 of the Exceptionless API):
```json
{
"id": "22cd0826e447a44e78877a22",
"url": "http://localhost:5200/event/22cd0826e447a44e78877a22",
"occurrence_date": "2014-01-17T14:37:02.739-06:00",
"type": "error",
"message": "A potentially dangerous Request.Path value was detected from the client (&).",
"project_id": "537650f3b77efe23a47914f4",
"project_name": "Disintegrating Pistol",
"organization_id": "537650f3b77efe23a47914f3",
"organization_name": "Acme",
"stack_id": "1ecd0826e447a44e78877ab1",
"stack_url": "http://localhost:5200/stack/1ecd0826e447a44e78877ab1",
"stack_title": "A potentially dangerous Request.Path value was detected from the client (&).",
"stack_tags": [
"Test"
],
"total_occurrences": 0,
"first_occurrence": "2014-01-17T20:37:02.739Z",
"last_occurrence": "2014-01-17T20:37:02.739Z",
"is_new": false,
"is_regression": false,
"is_critical": false
}
```
To see both v1 and v2 models for events and stacks, [see this link](https://github.com/exceptionless/Exceptionless/tree/master/tests/Exceptionless.Tests/Plugins/WebHookData).
---
[Next > FAQ](/docs/FAQ)
- [Managing Stacks](https://exceptionless.com/docs/managing-stacks/)
# Managing Stacks
Perhaps the most important thing you'll do in Exceptionless is manage your stacks. Think of stacks as your todo list for error management. And like any good todo list, you can drill into a task for more details, mark the task complete, or set the task aside for a later date.
But what is a stack, exactly? It's pretty simple, actually. A stack is an automatically ([or manually](/docs/manual-stacking)) grouped list of events. Events can be errors, messages, or logs. Exceptionless will try to automatically group the same events together while gathering as much information about them as possible (i.e. number of users affected, frequency of the event, last occurrence).
### Viewing Stacks
Now, let's take a look at how you manage these stacks. When you first sign in, you'll be taken to your dashboard on the Most Frequent view.

Click on a stack you'd like to manage (We recommend you start with the most frequent event because that's probably pretty annoying for your customers 😉). Clicking on a stack will take you to a detailed view that includes important information such as how many times the event occurred, the number of users impacted, and the first and last occurrences of the event.

### Applying Statuses
To apply a status on a stack, click the dropdown in the top-right and apply the appropriate selection. Selection options include:
* Open
* Fixed
* Snoozed
* Ignored
* Discarded

Marking the status of a stack will control your [filtering](/docs/filtering-and-searching) options, but it can also drive your workflow. Ignored stacks may be stacks you have no plans of addressing. Discarded stacks (which do not count against your plan quota) may be stacks that you can't easily prevent from coming through but you don't want to see and don't care about. Snoozing stacks allows you to be reminded at a future point to address the stack in question.
Let's take a look at each status in detail:
**Open** - This status indicates that the error is new or actively occurring. You will receive email notifications for these issues.
**Fixed** - Well, this one means you fixed it. If you look at Exceptionless as your todo list for errors, marking a stack as "Fixed" is like checking an item off your todo list. To be more specific, you won't get notifications if you have marked events as fixed. You will have the opportunity to provide your software's version number in which the fix was introduced. If another error comes through of the same kind and it matches the version number that was supposed to fix the issue, your stacks will be marked as "Regressed" instead of "Fixed". Additionally, if you mark a stack as Fixed but do not supply a version number in which it was fixed, should the event happen again, the stack will be marked as "Regressed".
**Snoozed** - Marking a stack as snoozed means you will not get email notifications for whatever period of time you indicate. This is like your alarm clock in the morning. You know you need to take action (like wake up or fix the bug), but you really don't want to yet. Snooze has your back. After the specified period of time, the stacks will once again start alerting you.
**Ignored** - When you ignore a stack, you will no longer receive email notifications unless you change the status. You may choose to do this when you have no intentions of resolving the issue but still want to collect information from the stacks.
**Discarded** - You should use this status when you do not care about the event at all. If "Ignored" is turning your back on an event and trying not to see it, "Discarded" is putting its feet in cement and dropping it into the middle of a lake. And since these events are sleeping with the fishes, they don't count against your plan quota.
Beyond statuses, you have options to further control your stacks.
### Additional Options

Marking a stack with "Future Occurrences are Critical" will automatically tag all subsequent events that come into that stack with the critical tag and will make them more prominent for you to review.
The "Promote to External" option allows you to send the stack details to an external source that you've configured through webhooks in the [Integrations](/docs/integrations) section. This can help you automate issue tracking and project management. For example, you can use this functionality to connect to [Zapier](https://zapier.com), a no-code automation tool. By doing so, you can automatically funnel events from Exceptionless to issues on Github or Jira. You can send text alerts to your devops team (just be smart about this one because those folks need sleep too!), or you can use the data from Exceptionless to build custom dashboards for your entire organization.
Adding a "Reference Link" allows you to supply to a link from an external source. This is helpful when a customer files a Github issue, for example. You can link to Github or to a Slack conversation, or anywhere, really.
Managing your stacks is the core focus within Exceptionless, and we try to automate as much as possible for you. However, it is possible to manually stack events, allowing you some of the same management tools outlined here.
---
[Next > Manual Stacking](/docs/manual-stacking)
- [Manual Stacking](https://exceptionless.com/docs/manual-stacking/)
# Manual Stacking
We try to group events into intuitive stacks, but sometimes you might want to create your own for organization, reporting, troubleshooting, etc. A good example use case might be when you are introducing a new feature. The errors or events you send to Exceptionless may ultimately look like or be the same as events linked to other features in your applications. However, you might want to see the events triggered by use of this new feature stacked together.
How might we do this? You can use the `SetManualStackingKey` method to facilitate this need.
## Creating Custom Stacks
In the below examples, we use `SetManualStackingKey` and are naming the custom stack "MyCustomStackingKey" and setting the value to "ANOTHER FEATURE. What this does is it ensures that any events, regardless of the type or reason for the event, will be grouped together.

In the example above, the events grouped under "My stack title" use custom stacking keys to group them together. Let's see how you would do this in practice.
## cURL Example
```shell
curl --location --request POST 'https://api.exceptionless.com/api/v2/events' \
--header 'Authorization: Bearer XUlBBdgFxAlmCsAZHDFTIacXpzYuZDuqDzzFYMlR' \
--header 'Content-Type: application/json' \
--data-raw '{ "type": "error",
"date":"2030-01-01T12:00:00.0000000-05:00",
"title": "NEW FEATURE WORK",
"@simple_error": {
"message": "Weird Exception",
"type": "System.Exception",
"stack_trace": " at Client.Tests.ExceptionlessClientTests.CanSubmitSimpleException() in ExceptionlessClientTests cs:line 99"
},
"@stack": { "title": "My stack title", "signature_data": { "mystackingkey": "ANOTHER FEATURE" }}
```
## C# Example
```csharp
try {
throw new ApplicationException("Unable to create order from quote.");
} catch (Exception ex) {
ex.ToExceptionless().SetManualStackingKey("MyCustomStackingKey").Submit();
}
```
Or, you can set the stacking directly on an event (e.g., inside a plugin).
```csharp
event.SetManualStackingKey("MyCustomStackingKey");
```
## JavaScript Example
```javascript
var client = exceptionless.ExceptionlessClient.default;
// Node.Js
// var client = require('exceptionless').ExceptionlessClient.default;
try {
throw new Error('Unable to create order from quote.');
} catch (error) {
client.createException(error).setManualStackingKey('MyCustomStackingKey').submit();
}
```
## When Should You Use This
Custom, manual stacking is certainly an advanced feature. We have tried to make your experience fantastic without needing this functionality, but sometimes, there's no avoiding it. So, let's think about some times when you might want to use manual stacking:
* Critical Functionality - if you have a piece of your app that you need see all errors for quickly, manual stacking would be perfect.
* Logs - we tend to think of stacks as errors, but they don't have to be, and you can easily use manual stacking to group logs for other purposes.
* Notifications - manual stacking makes it easy to set up [notifications](/docs/notifications) for errors or events that happen from a specific source that you define.
---
[Next > Filtering & Searching](/docs/filtering-and-searching)
- [Notifications](https://exceptionless.com/docs/notifications/)
# Notifications
To turn on email notifications, go to "My Account" in your dashboard, then click on the "Notifications" tab.
Once you're in there, you can select the project you want to edit notifications to, and then select which notifications you want to receive for that selected project.

---
[Next > Log Levels](/docs/setting-log-levels)
- [Project Settings](https://exceptionless.com/docs/project-settings/)
# Project Settings
Exceptionless is different from most error monitoring services in that it provides you with real-time updates. That includes updates from your Exceptionless project settings to your client. What does that mean?
All project settings are synced to the client in almost real time, so when an event is submitted to Exceptionless we send down a response header with the current configuration version. If a newer version is available we will immediately retrieve and apply the latest configuration. We will also periodically check for newer configuration when the client is idle.
By default the client will check after `5 seconds` on client startup (*if no events are submitted on startup*) and then every `2 minutes` after the last event submission for updated configuration settings.
- Checking for updated settings doesn't count towards plan limits.
- Only the current configuration version is sent when checking for updated settings (no user information will ever be sent).
- If the settings haven't changed, then no settings will be retrieved.
You can also **turn off the automatic updating of configuration settings when idle** in each client respectively. Please see the client specific documentation.
Now, let's take a look at the available settings for your projects. There are quite a few, so feel free to jump to the section that interests you below:
- API Keys
- Data Exclusions
- Example usage
- Error Stacking
- User Namespaces
- Common Methods
- Spam Detection
- Automatic Spam Detection
- Client Configuration
- Event Exclusions
- Example
- Using Client Configuration Settings
---
## API Keys
Before doing anything, you want to create an API Key for your project. This protects you and your team by ensuring you are using a revokable key. Instead of using a user-scoped key that would provide access to everything, a project-scoped key is limited to—you guessed it—a single project.
To generate an API Key, go to your project settings page and click on the API Keys tab. There, you can click the New API Key button.
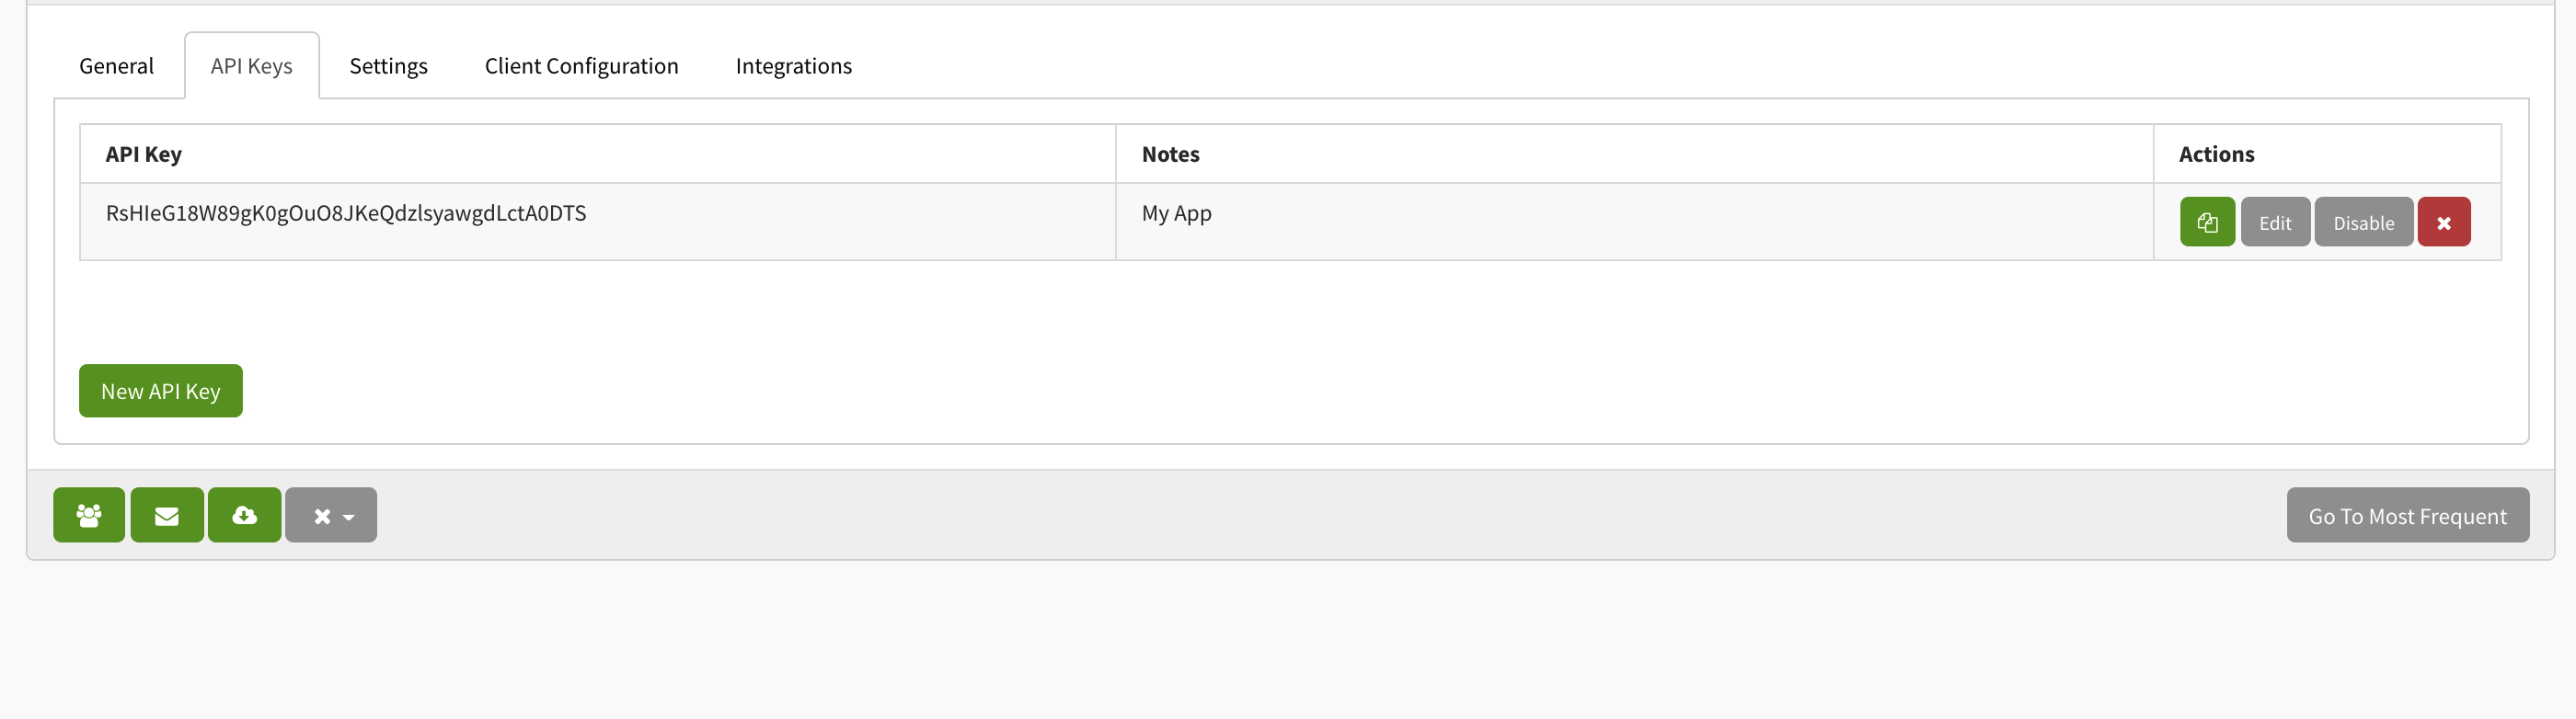
## Data Exclusions
Data can be excluded from your error reports by specifying the information you'd like excluded. This is especially important when you are dealing with sensitive information. For example, an error on log in might, by default, send a user's password to our server. You probably don't want that, so you can exclude that type of data from being sent. For more on how we handle security issues, check out our [security page](/docs/security).
To get started, go to your project settings page, click the Settings tab.

A comma delimited list of field names that should be removed from any error report data (e.g., extended data properties, form fields, cookies and query parameters). Data Exclusions can be configured on the project settings page. You can also specify a field name with wildcards `*` to specify starts with, ends with, or contains just to be extra safe.
### Example usage
- Entering `Password` will remove any field **named** `Password` from the report.
- Entering `Password*` will remove any field that **starts with** `Password` from the report.
- Entering `*Password` will remove any field that **ends with** `Password` from the report.
- Entering `*Password*` will remove any field that **contains** `Password` from the report.
---
## Error Stacking
You can also control how errors are stacked by specifying user namespaces (if you application code utilizes namespaces) or common methods (in all apps) to ignore. Let's take a look at how each works.
### User Namespaces
If your app runs on .NET or other languages that support namespaces, you can define what namespaces your code runs in. This allows Exceptionless to pick a stacking target within your code.
You can set this up on the project settings page in the Settings tab. You simply need to provide, a comma delimited list of the namespace names that your applications code belongs to. If this value is set, only methods inside of these namespaces will be considered as stacking targets.
### Common Methods
Slightly different from your namespace definitions above, defining common methods here will *exclude* stacks from building up for specified methods. This is important as you may have catch-all methods in your code or specific methods that you expect to have frequent errors you'd rather not pass to Exceptionless.
You can set this up on the project settings page in the Settings tab. Simply supply a comma delimited list of common method names that should not be used as stacking targets.
---
## Spam Detection
Spam detection allows you to prevent noise from being tracked. Bots crawling your site or app can contribute to stacks that you simply do not want to see or track. We make it easy to filter these out.
On your project settings page, click the Settings tab and scroll down to the Spam Detection section. There, you can also specify a comma delimited list of user agents that should be ignored client side. This list supports wildcards and by default covers a vast major of bots.
### Automatic Spam Detection

We also provide you with a simple tool to automatically detect spam from a single IP address sending in a high volume of activity. Click the checkbox, and we will do the rest.
---
## Client Configuration
Custom client configuration values allow you to control the behavior of your app in real time. They are a dictionary of key value pairs (string key, string value). Usage examples include controlling data exclusions to protecting sensitive data and or enabling/disabling features.
To set up custom client configurations, click the All Projects drop down in the navigation header when you are signed into Exceptionless. Then, hover over your project name and you'll see a gear icon. Click that icon. This will take you to your project settings screen where you can click the tab called Client Configuration.

Once you have made changes to your Project Settings, the configuration values will only be read by your client if your client is aware of the configuration. This happens out of the box with the [Exceptionless .NET Client](/docs/clients/dotnet/) and the [Exceptionless JS Client](/docs/clients/javascript/). If you are building your own client or simply wrapping our API, you can still make use of these configuration values by reading them in periodically via a `GET` request to `/api/v2/projects/{id}/config`.
## Event Exclusions
The Exceptionless clients have the ability to automatically discard events based on client configuration settings. We have a plugin that looks at the client configuration settings using a simple key name convention.
To help us understand this consider that every event has a `Type` and `Source` property. The `Type` can be anything but we have a few first class types like [`error`, `usage`, `log`, `404`, `session`](https://github.com/exceptionless/Exceptionless/blob/master/src/Exceptionless.Core/Models/Event.cs#L92-L100). `Source` is usually set to the exception type when dealing with `error` events or the `log` source.
With that said, you can exclude any event type and source by adding a new client configuration key `@@EVENT_TYPE:SOURCE` by replacing the `EVENT_TYPE` and `SOURCE` respectively and specify a configuration value of `false`. *You can also specify a wild card `*` as part of the `SOURCE`.*
### Example
- To discard all errors of type `System.ArgumentNullException`:
- **KEY:** `@@error:System.ArgumentNullException`
- **VALUE:** `false`
- To discard all errors in general you would use a wildcard `*`:
- **KEY:** `@@error:*`
- **VALUE:** `false`
- To discard all 404s in general you would use a wildcard `*`:
- **KEY:** `@@404:*`
- **VALUE:** `false`
- To discard all 404s for a specific resource, use the resource's event source as the key.
- **KEY:** `@@404:/invalid-file-path.jpg`
- **VALUE:** `false`
We have also added some additional known values to support **minimum log levels**. The known values are: `Trace`, `Debug`, `Info`, `Warn`, `Error`, `Fatal`, `Off`.
- Sets a minimum log level of `Info` for my application:
- **KEY:** `@@log:*`
- **VALUE:** `Info`
- You can also set a log level on a per log source basis. This will override any general minimum log level (e.g., `@@log:*` you have defined!
- **KEY:** `@@log:*AuthController`
- **VALUE:** `Trace`
## Using Client Configuration Settings
- [.NET](/docs/clients/dotnet/client-configuration-values)
- [JavaScript / Node.js](/docs/clients/javascript/client-configuration-values)
---
[Next > Versioning](/docs/versioning)
- [Reference Ids](https://exceptionless.com/docs/references-ids/)
# Reference Ids
Reference Ids are unique identifiers that let you look up a submitted event. This is important because _event Ids are not created until after an event is processed, so there's no other way to look up an event_.
Reference Ids are also used to help deduplicate events on the server side.
## Uses
One example of using Reference Ids is to help support your users. For instance, we always include a Reference Id with every error message for our users, allowing them to contact us with that Reference Id and receive help faster because we can easily track it down.
## Reference Id Example
To attach Reference Ids to our errors in Exceptionless, we register a default Reference Id plugin that sets a Reference Id when the event is submitted and stores the Id in an implementation of ILastReferenceIdManager. With the default plugin, we enable this behavior by calling `UseReferenceIds()` on the configuration object.
## C# Example
```csharp
using Exceptionless;
ExceptionlessClient.Default.Configuration.UseReferenceIds();
```
## JavaScript Example
The JavaScript client will automatically manage reference ids.
You can also create your own plugin to create your own Reference Ids.
## Get Last Used Reference Id
Call `GetLastReferenceId()` on the `ExceptionlessClient` instance.
### C# Last Reference Id Example
```csharp
using Exceptionless;
// Get the last created Reference Id
ExceptionlessClient.Default.GetLastReferenceId();
```
### JavaScript Last Reference Id Example
```javascript
// Get the last created Reference Id
exceptionless.ExceptionlessClient.default.getLastReferenceId();
```
## Displaying Reference Ids to End Users
We do this for our end users because it allows them to better support their app users.
To do so, we add a custom `IExceptionHandler` and return a new error response to include the Reference Id as shown below:
```csharp
public class ExceptionlessReferenceIdExceptionHandler : IExceptionHandler {
public Task HandleAsync(ExceptionHandlerContext context, CancellationToken cancellationToken) {
if (context == null)
throw new ArgumentNullException(nameof(context));
var exceptionContext = context.ExceptionContext;
var request = exceptionContext.Request;
if (request == null)
throw new ArgumentException($"{typeof(ExceptionContext).Name}.{"Request"} must not be null", nameof(context));
context.Result = new ResponseMessageResult(CreateErrorResponse(request, exceptionContext.Exception, HttpStatusCode.InternalServerError));
return TaskHelper.Completed();
}
private HttpResponseMessage CreateErrorResponse(HttpRequestMessage request, Exception ex, HttpStatusCode statusCode) {
HttpConfiguration configuration = request.GetConfiguration();
HttpError error = new HttpError(ex, request.ShouldIncludeErrorDetail());
string lastId = ExceptionlessClient.Default.GetLastReferenceId();
if (!String.IsNullOrEmpty(lastId))
error.Add("Reference", lastId);
// CreateErrorResponse should never fail, even if there is no configuration associated with the request
// In that case, use the default HttpConfiguration to con-neg the response media type
if (configuration == null) {
using (HttpConfiguration defaultConfig = new HttpConfiguration()) {
return request.CreateResponse(statusCode, error, defaultConfig);
}
}
return request.CreateResponse(statusCode, error, configuration);
}
}
```
Then we replace the existing `IExceptionFilter`
```csharp
Config.Services.Replace(typeof(IExceptionHandler), new ExceptionlessReferenceIdExceptionHandler());
```
Now you'll get a user friendly error response that contains a Reference Id, like:
`{
"message": "An error has occurred.",
“reference”: “411085622e”
}`
## Looking up Events by Reference Id
Link directly to an event by outputting a link in your UI or log files, like
`https://be.exceptionless.io/event/by-ref/YOUR_REFERENCE_ID)`
Or you can search via the api/ui with `reference:YOUR_REFERENCE_ID`
---
[Next > User Sessions](/docs/user-sessions)
- [Security](https://exceptionless.com/docs/security/)
# Security
Exceptionless follows industry best practices and uses SSL out of the box to be as secure as possible. We also provide you with the tools to take your information security to the next level. These tools include Data Exclusions. To accommodate various data protection laws, Exceptionless allows you to prevent the transmission of specified pieces of information through Data Exclusions.
### Data Exclusions
These exclusions are simply a comma delimited list of field names that should be removed from any error report data (e.g., extended data properties, form fields, cookies and query parameters). Data Exclusions can be configured on the project settings page. You can also specify a field name with wildcards `*` to specify starts with, ends with, or contains just to be extra safe.
#### Example usage:
Entering `Password` will remove any field **named** `Password` from the report.
Entering `Password*` will remove any field that **starts with** `Password` from the report.
Entering `*Password` will remove any field that **ends with** `Password` from the report.
Entering `*Password*` will remove any field that **contains** `Password` from the report.
[See more on data exclusions here](/docs/project-settings#data-exclusions).
---
[Next > API Usage](/docs/api/)
- [Self Hosting](https://exceptionless.com/docs/self-hosting/)
# Self Hosting
Exceptionless can be self-hosted by either manually running the source code for the server and the frontend or by using our simply Docker image.
You can also use Kubernetes while self-hosting Exceptionless. We'll cover both topics in the following pages.
* [Docker](/docs/self-hosting/docker)
* [Kubernetes](/docs/self-hosting/kubernetes)
* [Upgrading](/docs/self-hosting/upgrading-self-hosted-instance)
---
[Next > Docker](/docs/self-hosting/docker)
- [Docker](https://exceptionless.com/docs/self-hosting/docker/)
# Docker
If you would like to test Exceptionless locally, please follow this section.
## Requirements
* [Docker](https://www.docker.com)
## Testing Setup
Runs Exceptionless without persisting data between runs. Good for checking out Exceptionless for the first time and testing.
```bash
docker run --rm -it -p 5200:8080 exceptionless/exceptionless:latest
```
## Simple Setup
Runs a very simple non-production setup for Exceptionless with data persisted between runs in a sub-directory of the current directory called `esdata`. It uses an embedded single node Elasticsearch cluster and does not have backups. It is recommended that you create your own Elasticsearch cluster for production deployments of Exceptionless.
On Linux:
```bash
docker run --rm -it -p 5200:8080 \
-v $(pwd)/esdata:/usr/share/elasticsearch/data \
exceptionless/exceptionless:latest
```
On PowerShell:
```powershell
docker run --rm -it -p 5200:8080 `
-v ${PWD}/esdata:/usr/share/elasticsearch/data `
exceptionless/exceptionless:latest
```
## Simple Setup w/SSL Support and SMTP
Runs a very simple non-production setup for Exceptionless with data persisted between runs in a sub-directory of the current directory called `esdata`. It uses an embedded single node Elasticsearch cluster and does not have backups. It is recommended that you create your own Elasticsearch cluster for production deployments of Exceptionless. In the SMTP password characters disallowed or reserved according to RFC-2396 (e.g. @:#/?+) need to be percent-encoded (e.g. # => %23).
Set `EX_BaseURL` to the externally accessible Exceptionless URL and use an `EX_SmtpFrom` address authorized by your SMTP provider.
On Linux:
```bash
docker run --rm -it -p 5200:8080 -p 5089:443 \
-e EX_ConnectionStrings__Email=smtps://user:password@smtp.host.com:587 \
-e EX_BaseURL=https://example.com \
-e 'EX_SmtpFrom=Exceptionless ' \
-e ASPNETCORE_URLS="https://+;http://+" \
-e ASPNETCORE_HTTPS_PORT=5001 \
-e ASPNETCORE_Kestrel__Certificates__Default__Password="password" \
-e ASPNETCORE_Kestrel__Certificates__Default__Path=/https/aspnetapp.pfx \
-v ~/.aspnet/https:/https/ \
-v $(PWD)/esdata:/usr/share/elasticsearch/data \
exceptionless/exceptionless:latest
```
On PowerShell:
```powershell
docker run --rm -it -p 5200:8080 -p 5089:443 `
-e EX_ConnectionStrings__Email=smtps://user:password@smtp.host.com:587 `
-e EX_BaseURL=https://example.com `
-e "EX_SmtpFrom=Exceptionless " `
-e ASPNETCORE_URLS="https://+;http://+" `
-e ASPNETCORE_HTTPS_PORT=5001 `
-e ASPNETCORE_Kestrel__Certificates__Default__Password="password" `
-e ASPNETCORE_Kestrel__Certificates__Default__Path=/https/aspnetapp.pfx `
-v ~/.aspnet/https:/https/ `
-v ${PWD}/esdata:/usr/share/elasticsearch/data `
exceptionless/exceptionless:latest
```
---
[Next > Kubernetes](/docs/self-hosting/kubernetes)
- [Kubernetes](https://exceptionless.com/docs/self-hosting/kubernetes/)
Please follow this section to set up Exceptionless in a Kubernetes environment. Please note this section is a work in progress, any contributions is greatly appreciated.
## Requirements
* [Kubernetes](https://kubernetes.io)
* [Helm](https://helm.sh)
## Instructions
Please note that we recommend you use Kubernetes for running in production.
1. Follow the steps [here](https://github.com/exceptionless/Exceptionless/blob/master/k8s/ex-setup.ps1) for how to create it in AKS
2. View the configuration settings below for more information on configuring Exceptionless.
3. [Configure your clients](/docs/clients/) to send errors to your website.
Now, you can create a local account, organization, and project and send events to it.
## Configuration
The following section will cover how to configure exceptionless inside of a Kubernetes instance using the `exceptionless-config` config map. All exceptionless configuration keys are prefixed with `EX_`. Please note that these instructions also apply to docker using environment variables.
All configuration options and settings can be found in the various option classes located [here](https://github.com/exceptionless/Exceptionless/tree/master/src/Exceptionless.Core/Configuration).
_Please note that if you are specifying configuration via `docker-compose`, then you will need to drop the `EX_` and `EX_ConnectionStrings__` prefixes._
## ConnectionStrings
```yaml
# connection string used for any provider specifying Redis.
EX_ConnectionStrings__Redis: localhost:6379,abortConnect=false
EX_ConnectionStrings__Cache: provider=redis;
EX_ConnectionStrings__Elasticsearch: server=http://10.0.0.4:9200;
EX_ConnectionStrings__Email: smtps://user%40domain.com:password@smtp.domain.com:465
EX_ConnectionStrings__MessageBus: provider=redis;
EX_ConnectionStrings__Metrics: provider=statsd;server=localhost
EX_ConnectionStrings__Queue: provider=redis;
EX_ConnectionStrings__Storage: provider=azurestorage;
```
You can append values to any connection string using a `;`. For example, you can control many shards and replicas each Elasticsearch index should be created with by appending to the `EX_ConnectionStrings__Elasticsearch` connection string. For a Elasticsearch cluster (3 nodes, two masters), you would append `shards=3;replicas=1`.
The `provider` value determines what implementations to use for the various abstractions. We've made it easier to reuse a single connection string by automatically looking up a connection string by the provider name and adding any key value pairs to the current connection string (as shown above with redis).
## General Configuration
1. You'll want to set the `EX_ApiUrl` key to your external url of the api.
2. You'll want to set the `EX_BaseUrl` key to your external url of the website. If you are not following the clean urls optional section below, please make sure you also add the hashbang (`/#!`) to the base url.
3. `EX_AppMode` should be set to `Production` if you want to send unrestricted emails.
4. Please take a quick look at all the configuration options and settings that can be found in the various option classes located [here](https://github.com/exceptionless/Exceptionless/tree/master/src/Exceptionless.Core/Configuration).
## Active Directory Authentication
To enable Active Directory authentication, update the Update the `exceptionless-config` config map to include the `EX_ConnectionStrings__LDAP` connection string. The value should be your domain's LDAP URI (e.g. `LDAP://ad.domain.com/` or `LDAP://ad.domain.com/DC=domain,DC=com`).
Please note the following:
1. Users must still go through the registration process using their AD credentials. This allows account setup to proceed as normal. AD credentials are **not** stored.
2. Exceptionless relies on the following properties being available in AD:
* `mail`: user's email address
* `givenName`: user's first name
* `sn`: user's last name
* `sAMAccountName`: user's username
3. To ensure the correct account information is retrieved for a user, consider using a more specific connection string to narrow down the LDAP account type. For example: `LDAP://ad.domain.com/OU=Standard Users,OU=User Accounts,DC=domain,DC=com`
## Enabling Slack Integrations
1. Create a Slack app for your workspace
* __Please do not distribute your app outside of your organization.__
2. Go to the `OAuth & Permissions` feature. Add a new redirect URL. The redirect URL should be your Exceptionless base URL.
3. On the *basic info* page of your Slack App, you will need to find the Client ID and Client Secret
4. Update the `exceptionless-config` config map `ConnectionStrings__OAuth` value to include `SlackId=YOUR_ID;SlackSecret=YOUR_SECRET;` and restart the associated pods.
5. If you've already loaded a page in Exceptionless, you will need to do a hard refresh for the config changes to apply.
## Upgrading
Please see the [Upgrading](/docs/self-hosting/upgrading-self-hosted-instance) for details on how to upgrade to the current version.
## Troubleshooting
If you are having issues please try the following to resolve the issues. If this doesn't work please open an issue or contact us on [Discord](https://discord.gg/xv3sjurVwA).
* Make sure you are running the latest release by visiting our [releases page](https://github.com/exceptionless/Exceptionless/releases). You can verify the version you are currently running by accessing the status page [`http://localhost/api/v2/about`](http://localhost/api/v2/about).
* You can also enable detailed logging by updating the `Serilog__MinimumLevel__Default` config map value to `Debug`.
---
[Next > Upgrading](/docs/self-hosting/upgrading-self-hosted-instance)
- [Upgrading](https://exceptionless.com/docs/self-hosting/upgrading-self-hosted-instance/)
# Upgrading
**Please ensure that you have created backups before upgrading!**
**If you are upgrading from v1 or [v2](https://github.com/exceptionless/Exceptionless/releases/tag/v2.0.0) you will need to upgrade to [v3.0](https://github.com/exceptionless/Exceptionless/releases/tag/v3.0.0) before upgrading to the latest release.**
## Upgrading from v7.1 to v8
We simplified the self hosting process by integrating the UI into the existing app images. As such `exceptionless/ui` docker images are deprecated and we recommend using `exceptionless/app`.
We also upgraded to Elasticsearch 8 in the base images. One requirement of upgrading with existing data is the Elasticsearch data is loaded with the latest Elasticsearch 7.x release. If you are using the all in one image, first use `exceptionless/exceptionless:8.0.0-elasticsearch7` and wait for the app to startup and give it some time. Then turn off the app and then use `exceptionless/exceptionless:8.0.0` image. We will be deprecating the `exceptionless/exceptionless:8.0.0-elasticsearch7` image in the future, this is only there to help with the upgrade process.
You may also need to update the connection strings. In v8.2.7 we updated the Redis Connection String to remove the `server=` prefix.
## Upgrading from v7 to v7.1
We made some changes to email configuration. Yoy wukk now be required to set the `EX_SmtpFrom` config map/environment variable in order to send email. The value should be in the following format: `"Exceptionless "`
## Upgrading from v6 to v7
A migration job will need to be run as there are several in place data migrations that need to be applied. The migrations will add new index mappings for soft delete support as well as stack status and populate various stack fields with data.
1. You'll need to run an out of process `Migration` job. In order to do this you'll need to update configuration to ensure it's pointing to your Elasticsearch (e.g., `EX_ConnectionStrings__Elasticsearch` environment variable/connection string) and Redis instances.
2. Scale down existing Exceptionless apps and jobs.
3. Start the `Migration` job.
1. For docker, you just need to pass the `Migration` argument to the `exceptionless/job` container image (e.g., `docker run exceptionless/job:latest Migration`). Please remember to pass any configuration settings (e.g., connection strings) to the migration job.
2. For Kubernetes, you can run [`kubectl apply -f manual-migration-job.yaml`](https://github.com/exceptionless/Exceptionless/blob/master/k8s/manual-migration-job.yaml). Please note that you may have to tweak namespaces and container image version.
4. Scale back up and you should be good to go.
## Upgrading from v5 to v6
Version 6 added support for Elasticsearch 7, which requires a complete data migration from Elasticsearch 5.x. This tutorial assumes you have docker/Kubernetes installed and have followed the [setup guide](/docs/self-hosting/).
1. Create a new Elasticsearch 7 cluster or modify your existing `docker-compose` file to also include our Elasticsearch 7.x image (There will need to be two Elasticsearch docker instances (5.x and 7.x). Please note that we've included the Elasticsearch major version number in the data path of the docker data path, this allows you to run two versions side by side without losing the data.
2. Add a new environment variable or config map setting for `EX_ElasticsearchToMigrate` with the value of the `EX_Elasticsearch` 5.x connection string.
3. Add your existing Elasticsearch instance to `reindex.remote.whitelist` in Elasticsearch 7's `elasticsearch.yml`. Make sure you include the port as well, for example `reindex.remote.whitelist: 127.0.0.1:9200`.
4. Update the existing `EX_Elasticsearch` environment variable or config map entry to point to the Elasticsearch 7.x Cluster.
5. Scale down existing Exceptionless apps and jobs.
6. Start the Data Migration by running the `DataMigration` job. You can run it by opening the CLI and executing `dotnet Exceptionless.Job.dll DataMigration`. If you receive a warning that the port is already used, you need to change `ASPNETCORE_URLS` first, for example `ASPNETCORE_URLS=http://+:8080`. You can also run an incremental reindex by setting the `EX_ReindexCutOffDate` with a date value (E.G., `2022-01-28T18:00:00.00Z`., environment variable or config map entry and rerunning the Migration Job.
7. Scale up the rest of the app!
## Upgrading from v4 to v5
We now only provide official docker images as release artifacts. This tutorial assumes you have docker/Kubernetes installed and have followed the [setup guide](/docs/self-hosting/).
1. We now can run on linux or windows as we are running on ASP.NET Core! As a result we've completely redone the configuration. For the most part we've prefixed configuration with `EX_` and simplified it as much as possible. I'd recommend taking a look at your previous configuration settings and then read over the following [configuration document](/docs/self-hosting/kubernetes#configuration) to migrate your settings.
2. Please note that no Elasticsearch changes are required. You can continue to use your existing Elasticsearch cluster. You just need to update the connection string by following step 1.
3. Please note that the UI and API no longer run on the same port as they are now two different docker images. You may need to update your server url accordingly in your client applications.
## Upgrading from v3 to v4
This process requires you to setup and configure a new Elasticsearch 5 instance and reindex your existing Elasticsearch 1.x data into the Elasticsearch 5 instance using [external reindexing](https://www.elastic.co/guide/en/elasticsearch/reference/current/docs-reindex.html). This tutorial assumes you have Elasticsearch 5 Kibana instance installed and configured.
1. Edit the Elasticsearch 5's `elasticsearch.yml` configuration file.
1. Add the `reindex.remote.whitelist: 10.0.0.9:9200` setting with a value that contains the IP address or hostname of the 1.x server. This allows you to reindex the 1.x data into your new 5.x instance.
2. Temporarily comment out (with a leading `#`) the following line: `#action.auto_create_index: .security,.monitoring*,.watches,.triggered_watches,.watcher-history*`
3. Restart the elasticsearch service.
2. Open Kibana (E.G., [http://localhost:5601](http://localhost:5601)) and execute the following scripts to reindex your data.
### Create Organization Index with the correct mappings:
```json
PUT organizations-v1
{
"settings": {
"index.number_of_replicas": 1,
"index.number_of_shards": 3,
"analysis": {
"analyzer": {
"keyword_lowercase": {
"type": "custom",
"filter": [
"lowercase"
],
"tokenizer": "keyword"
}
}
}
},
"aliases": {
"organizations": {}
},
"mappings": {
"organization": {
"dynamic": false,
"properties": {
"id": {
"type": "keyword"
},
"created_utc": {
"type": "date"
},
"updated_utc": {
"type": "date"
},
"name": {
"type": "text",
"fields": {
"keyword": {
"type": "keyword",
"ignore_above": 256
}
}
},
"stripe_customer_id": {
"type": "keyword"
},
"has_premium_features": {
"type": "boolean"
},
"plan_id": {
"type": "keyword"
},
"plan_name": {
"type": "keyword",
"ignore_above": 256
},
"subscribe_date": {
"type": "date"
},
"billing_status": {
"type": "float"
},
"billing_price": {
"type": "double"
},
"is_suspended": {
"type": "boolean"
},
"retention_days": {
"type": "integer"
},
"invites": {
"type": "object",
"properties": {
"token": {
"type": "keyword"
},
"email_address": {
"type": "text",
"analyzer": "keyword_lowercase"
}
}
},
"usage": {
"type": "object",
"properties": {
"date": {
"type": "date"
},
"total": {
"type": "float"
},
"blocked": {
"type": "float"
},
"limit": {
"type": "float"
},
"too_big": {
"type": "float"
}
}
},
"overage_hours": {
"type": "object",
"properties": {
"date": {
"type": "date"
},
"total": {
"type": "float"
},
"blocked": {
"type": "float"
},
"limit": {
"type": "float"
},
"too_big": {
"type": "float"
}
}
}
}
},
"project": {
"dynamic": false,
"properties": {
"id": {
"type": "keyword"
},
"created_utc": {
"type": "date"
},
"updated_utc": {
"type": "date"
},
"organization_id": {
"type": "keyword"
},
"name": {
"type": "text",
"fields": {
"keyword": {
"type": "keyword",
"ignore_above": 256
}
}
},
"next_summary_end_of_day_ticks": {
"type": "long"
}
}
},
"token": {
"dynamic": false,
"properties": {
"id": {
"type": "keyword"
},
"created_utc": {
"type": "date"
},
"updated_utc": {
"type": "date"
},
"expires_utc": {
"type": "date"
},
"organization_id": {
"type": "keyword"
},
"project_id": {
"type": "keyword"
},
"default_project_id": {
"type": "keyword"
},
"user_id": {
"type": "keyword"
},
"refresh": {
"type": "keyword"
},
"scopes": {
"type": "keyword"
},
"type": {
"type": "byte"
}
}
},
"user": {
"dynamic": false,
"properties": {
"id": {
"type": "keyword"
},
"created_utc": {
"type": "date"
},
"updated_utc": {
"type": "date"
},
"organization_ids": {
"type": "keyword"
},
"full_name": {
"type": "text",
"fields": {
"keyword": {
"type": "keyword",
"ignore_above": 256
}
}
},
"email_address": {
"type": "text",
"fields": {
"keyword": {
"type": "keyword",
"ignore_above": 256
}
},
"analyzer": "keyword_lowercase"
},
"verify_email_address_token": {
"type": "keyword"
},
"password_reset_token": {
"type": "keyword"
},
"roles": {
"type": "keyword"
},
"o_auth_accounts": {
"type": "object",
"properties": {
"provider": {
"type": "keyword"
},
"provider_user_id": {
"type": "keyword"
},
"username": {
"type": "keyword"
}
}
}
}
},
"webhook": {
"dynamic": false,
"properties": {
"id": {
"type": "keyword"
},
"created_utc": {
"type": "date"
},
"organization_id": {
"type": "keyword"
},
"project_id": {
"type": "keyword"
},
"url": {
"type": "keyword"
},
"event_types": {
"type": "keyword"
}
}
}
}
}
```
### Reindex Organization data from 1.x into 5.x **Please make sure you update the host name**:
```json
POST _reindex
{
"source": {
"remote": {
"host": "http://10.0.0.9:9200"
},
"index": "organizations-v1"
},
"dest": {
"index": "organizations-v1",
"op_type": "create"
},
"script": {
"inline": "if (ctx._source.modified_utc != null) { ctx._source.updated_utc = ctx._source.remove('modified_utc'); }",
"lang": "painless"
}
}
```
### Create Stack Index with the correct mappings:
```json
PUT stacks-v1
{
"settings": {
"index.number_of_replicas": 1,
"index.number_of_shards": 3
},
"aliases": {
"stacks": {}
},
"mappings": {
"stacks": {
"include_in_all": false,
"dynamic": false,
"properties": {
"id": {
"type": "keyword"
},
"organization_id": {
"type": "keyword"
},
"project_id": {
"type": "keyword"
},
"signature_hash": {
"type": "keyword"
},
"type": {
"type": "keyword"
},
"first_occurrence": {
"type": "date"
},
"last_occurrence": {
"type": "date"
},
"title": {
"type": "text",
"boost": 1.1,
"include_in_all": true
},
"description": {
"type": "text",
"include_in_all": true
},
"tags": {
"type": "text",
"fields": {
"keyword": {
"type": "keyword",
"ignore_above": 256
}
},
"boost": 1.2,
"include_in_all": true
},
"references": {
"type": "text",
"include_in_all": true
},
"date_fixed": {
"type": "date"
},
"fixed": {
"type": "boolean"
},
"fixed_in_version": {
"type": "keyword"
},
"is_hidden": {
"type": "boolean"
},
"is_regressed": {
"type": "boolean"
},
"occurrences_are_critical": {
"type": "boolean"
},
"total_occurrences": {
"type": "integer"
}
}
}
}
}
```
### Reindex Stack data from 1.x into 5.x **Please make sure you update the host name**:
```json
POST _reindex
{
"source": {
"remote": {
"host": "http://10.0.0.9:9200"
},
"index": "stacks-v1"
},
"dest": {
"index": "stacks-v1",
"op_type": "create"
}
}
```
### Create Event Template so daily indexes can be created with the correct mappings:
```json
PUT _template/events-v1
{
"template": "events-v1-*",
"settings": {
"number_of_shards": 1,
"number_of_replicas": 1,
"analysis": {
"analyzer": {
"comma_whitespace": {
"type": "pattern",
"pattern": "[,\\s]+"
},
"email": {
"type": "custom",
"filter": [
"email",
"lowercase",
"unique"
],
"tokenizer": "keyword"
},
"version_index": {
"type": "custom",
"filter": [
"version_pad1",
"version_pad2",
"version_pad3",
"version_pad4",
"version",
"lowercase",
"unique"
],
"tokenizer": "whitespace"
},
"version_search": {
"type": "custom",
"filter": [
"version_pad1",
"version_pad2",
"version_pad3",
"version_pad4",
"lowercase"
],
"tokenizer": "whitespace"
},
"whitespace_lower": {
"type": "custom",
"filter": [
"lowercase"
],
"tokenizer": "whitespace"
},
"typename": {
"type": "custom",
"filter": [
"typename",
"lowercase",
"unique"
],
"tokenizer": "typename_hierarchy"
},
"standardplus": {
"type": "custom",
"filter": [
"standard",
"typename",
"lowercase",
"stop",
"unique"
],
"tokenizer": "comma_whitespace"
}
},
"filter": {
"email": {
"type": "pattern_capture",
"patterns": [
"(\\w+)",
"(\\p{L}+)",
"(\\d+)",
"(.+)@",
"@(.+)"
]
},
"typename": {
"type": "pattern_capture",
"patterns": [
"\\.(\\w+)",
"([^\\()]+)"
]
},
"version": {
"type": "pattern_capture",
"patterns": [
"^(\\d+)\\.",
"^(\\d+\\.\\d+)",
"^(\\d+\\.\\d+\\.\\d+)"
]
},
"version_pad1": {
"type": "pattern_replace",
"pattern": "(\\.|^)(\\d{1})(?=\\.|-|$)",
"replacement": "$10000$2"
},
"version_pad2": {
"type": "pattern_replace",
"pattern": "(\\.|^)(\\d{2})(?=\\.|-|$)",
"replacement": "$1000$2"
},
"version_pad3": {
"type": "pattern_replace",
"pattern": "(\\.|^)(\\d{3})(?=\\.|-|$)",
"replacement": "$100$2"
},
"version_pad4": {
"type": "pattern_replace",
"pattern": "(\\.|^)(\\d{4})(?=\\.|-|$)",
"replacement": "$10$2"
}
},
"tokenizer": {
"comma_whitespace": {
"type": "pattern",
"pattern": "[,\\s]+"
},
"typename_hierarchy": {
"type": "path_hierarchy",
"delimiter": "."
}
}
}
},
"mappings": {
"events": {
"dynamic": "false",
"include_in_all": false,
"_all": {
"analyzer": "standardplus",
"search_analyzer": "whitespace_lower"
},
"_size": {
"enabled": true
},
"dynamic_templates": [
{
"idx_reference": {
"match": "*-r",
"mapping": {
"ignore_above": 256,
"type": "keyword"
}
}
}
],
"properties": {
"count": {
"type": "integer"
},
"created_utc": {
"type": "date"
},
"data": {
"properties": {
"@environment": {
"properties": {
"architecture": {
"type": "keyword"
},
"ip_address": {
"type": "text",
"index": false,
"copy_to": [
"ip"
],
"include_in_all": true
},
"machine_name": {
"type": "text",
"boost": 1.1,
"fields": {
"keyword": {
"type": "keyword",
"ignore_above": 256
}
},
"include_in_all": true
},
"o_s_name": {
"type": "text",
"copy_to": [
"os"
]
}
}
},
"@error": {
"properties": {
"data": {
"properties": {
"@target": {
"properties": {
"ExceptionType": {
"type": "text",
"index": false,
"copy_to": [
"error.targettype"
],
"include_in_all": true
},
"Method": {
"type": "text",
"index": false,
"copy_to": [
"error.targetmethod"
],
"include_in_all": true
}
}
}
}
}
}
},
"@level": {
"type": "text",
"fields": {
"keyword": {
"type": "keyword",
"ignore_above": 256
}
}
},
"@location": {
"properties": {
"country": {
"type": "keyword"
},
"level1": {
"type": "keyword"
},
"level2": {
"type": "keyword"
},
"locality": {
"type": "keyword"
}
}
},
"@request": {
"properties": {
"client_ip_address": {
"type": "text",
"index": false,
"copy_to": [
"ip"
],
"include_in_all": true
},
"data": {
"properties": {
"@browser": {
"type": "text",
"fields": {
"keyword": {
"type": "keyword",
"ignore_above": 256
}
}
},
"@browser_major_version": {
"type": "text"
},
"@browser_version": {
"type": "text",
"fields": {
"keyword": {
"type": "keyword",
"ignore_above": 256
}
}
},
"@device": {
"type": "text",
"fields": {
"keyword": {
"type": "keyword",
"ignore_above": 256
}
}
},
"@is_bot": {
"type": "boolean"
},
"@os": {
"type": "text",
"index": false,
"copy_to": [
"os"
]
},
"@os_major_version": {
"type": "text"
},
"@os_version": {
"type": "text",
"fields": {
"keyword": {
"type": "keyword",
"ignore_above": 256
}
}
}
}
},
"path": {
"type": "text",
"fields": {
"keyword": {
"type": "keyword",
"ignore_above": 256
}
},
"include_in_all": true
},
"user_agent": {
"type": "text",
"fields": {
"keyword": {
"type": "keyword",
"ignore_above": 256
}
}
}
}
},
"@simple_error": {
"properties": {
"data": {
"properties": {
"@target": {
"properties": {
"ExceptionType": {
"type": "text",
"index": false,
"copy_to": [
"error.targettype"
],
"include_in_all": true
}
}
}
}
}
}
},
"@submission_method": {
"type": "text",
"fields": {
"keyword": {
"type": "keyword",
"ignore_above": 256
}
}
},
"@user": {
"properties": {
"identity": {
"type": "text",
"boost": 1.1,
"fields": {
"keyword": {
"type": "keyword",
"ignore_above": 256
}
},
"analyzer": "email",
"search_analyzer": "whitespace_lower",
"include_in_all": true
},
"name": {
"type": "text",
"fields": {
"keyword": {
"type": "keyword",
"ignore_above": 256
}
},
"include_in_all": true
}
}
},
"@user_description": {
"properties": {
"description": {
"type": "text",
"include_in_all": true
},
"email_address": {
"type": "text",
"boost": 1.1,
"fields": {
"keyword": {
"type": "keyword",
"ignore_above": 256
}
},
"analyzer": "email",
"search_analyzer": "simple",
"include_in_all": true
}
}
},
"@version": {
"type": "text",
"fields": {
"keyword": {
"type": "keyword",
"ignore_above": 256
}
},
"analyzer": "version_index",
"search_analyzer": "version_search"
}
}
},
"date": {
"type": "date"
},
"error": {
"include_in_all": true,
"properties": {
"code": {
"type": "keyword",
"boost": 1.1
},
"message": {
"type": "text",
"fields": {
"keyword": {
"type": "keyword",
"ignore_above": 256
}
}
},
"targetmethod": {
"type": "text",
"boost": 1.2,
"fields": {
"keyword": {
"type": "keyword",
"ignore_above": 256
}
},
"analyzer": "typename",
"search_analyzer": "whitespace_lower"
},
"targettype": {
"type": "text",
"boost": 1.2,
"fields": {
"keyword": {
"type": "keyword",
"ignore_above": 256
}
},
"analyzer": "typename",
"search_analyzer": "whitespace_lower"
},
"type": {
"type": "text",
"boost": 1.1,
"fields": {
"keyword": {
"type": "keyword",
"ignore_above": 256
}
},
"analyzer": "typename",
"search_analyzer": "whitespace_lower"
}
}
},
"geo": {
"type": "geo_point"
},
"id": {
"type": "keyword",
"include_in_all": true
},
"idx": {
"type": "object",
"dynamic": "true"
},
"ip": {
"type": "text",
"analyzer": "comma_whitespace"
},
"is_deleted": {
"type": "boolean"
},
"is_first_occurrence": {
"type": "boolean"
},
"is_fixed": {
"type": "boolean"
},
"is_hidden": {
"type": "boolean"
},
"message": {
"type": "text",
"include_in_all": true
},
"organization_id": {
"type": "keyword"
},
"os": {
"type": "text",
"fields": {
"keyword": {
"type": "keyword",
"ignore_above": 256
}
}
},
"project_id": {
"type": "keyword"
},
"reference_id": {
"type": "keyword"
},
"source": {
"type": "text",
"fields": {
"keyword": {
"type": "keyword",
"ignore_above": 256
}
},
"include_in_all": true
},
"stack_id": {
"type": "keyword"
},
"tags": {
"type": "text",
"boost": 1.2,
"fields": {
"keyword": {
"type": "keyword",
"ignore_above": 256
}
},
"include_in_all": true
},
"type": {
"type": "keyword"
},
"updated_utc": {
"type": "date"
},
"value": {
"type": "double"
}
}
}
}
}
```
### Reindex Event data from 1.x into 5.x **Please make sure you update the host name**:
```json
POST _reindex
{
"source": {
"remote": {
"host": "http://10.0.0.9:9200"
},
"index": "events-v1-*",
"size": 200
},
"dest": {
"index": "events-v1-error"
},
"script": {
"lang": "painless",
"inline": "ctx._index = 'events-v1-' + DateTimeFormatter.ofPattern('yyyy.MM.dd').format(OffsetDateTime.parse(ctx._source.date).toInstant().atZone(ZoneOffset.UTC)); if (ctx._source.updated_utc == null) { ctx._source.updated_utc = ctx._source.created_utc; } if (ctx._source.is_deleted == null) { ctx._source.is_deleted = false; } if (!ctx.containsKey('data') || !(ctx.data.containsKey('@error') || ctx.data.containsKey('@simple_error'))) return null;def types = [];def messages = [];def codes = [];def err = ctx.data.containsKey('@error') ? ctx.data['@error'] : ctx.data['@simple_error'];def curr = err;while (curr != null) { if (curr.containsKey('type')) types.add(curr.type); if (curr.containsKey('message')) messages.add(curr.message); if (curr.containsKey('code')) codes.add(curr.code); curr = curr.inner;}if (ctx.error == null) ctx.error = new HashMap();ctx.error.type = types;ctx.error.message = messages;ctx.error.code = codes;"
}
}
```
### Delete the previous Event Template:
```json
DELETE _template/events-v1
```
## Upgrading from v2 to v3
_Please note that upgrading from [v2](https://github.com/exceptionless/Exceptionless/releases/tag/v2.0.0) to [v3](https://github.com/exceptionless/Exceptionless/releases/tag/v3.0.0) requires that `Redis` is installed and configured._
1. Download and extract the [v3](https://github.com/exceptionless/Exceptionless/releases/tag/v3.0.0) release to a temp folder.
2. Update the connection strings in the `App_Data\JobRunner\Job.exe.config` config file.
1. You'll also need to add a `Migration:MongoConnectionString` connection string for the migration jobs to run.
```xml
```
3. Open the terminal and run the following jobs to migrate data from previous major versions of Exceptionless. `Jobs.exe` can be found in the `\wwwroot\App_Data\JobRunner\` folder.
```powershell
Job.exe -t "Exceptionless.EventMigration.OrganizationMigrationJob, Exceptionless.EventMigration" -s "Exceptionless.Core.Jobs.JobBootstrapper, Exceptionless.Core"
```
## Upgrading from v1 to v3
_Please note that upgrading from v1 to [v3](https://github.com/exceptionless/Exceptionless/releases/tag/v3.0.0) requires that `Redis` is installed and configured._
1. Download and extract the [v3](https://github.com/exceptionless/Exceptionless/releases/tag/v3.0.0) release to a temp folder.
2. Update the connection strings in the `App_Data\JobRunner\Job.exe.config` config file.
1. You'll also need to add a `Migration:MongoConnectionString` connection string for the migration jobs to run.
```xml
```
3. Open the terminal and run the following jobs to migrate data from previous major versions of Exceptionless. `Jobs.exe` can be found in the `\wwwroot\App_Data\JobRunner\` folder.
```powershell
Job.exe -t "Exceptionless.EventMigration.StackMigrationJob, Exceptionless.EventMigration" -s "Exceptionless.Core.Jobs.JobBootstrapper, Exceptionless.Core"
Job.exe -t "Exceptionless.EventMigration.QueueEventMigrationsJob, Exceptionless.EventMigration" -s "Exceptionless.Core.Jobs.JobBootstrapper, Exceptionless.Core"
Job.exe -t "Exceptionless.EventMigration.EventMigrationJob, Exceptionless.EventMigration" -c -s "Exceptionless.Core.Jobs.JobBootstrapper, Exceptionless.Core"
Job.exe -t "Exceptionless.EventMigration.OrganizationMigrationJob, Exceptionless.EventMigration" -s "Exceptionless.Core.Jobs.JobBootstrapper, Exceptionless.Core"
```
- [Log Levels](https://exceptionless.com/docs/setting-log-levels/)
# Log Levels
Setting log levels allows you to control the flow of data into your Exceptionless account. This is important when you are trying to filter the signal from the noise. In most error monitoring services, you would need to manually configure what log levels are used to send events by customizing your code. With Exceptionless, you can update the log levels used right in the Exceptionless UI.
To configure your default log levels, go to your project settings page by clicking the project name dropdown in the top left of the header. Hover over your project name, then click the gear icon. Once on the project settings page, click the Settings tab. Here, you will see the default log level options.

You can change this at the project level or override the setting on the Stacks page. To override the global log level, click on "Log Messages" on the left side of your screen:

Next, you'll want to do one of two things:
### 1. Click on "New Stacks" and then click on the log stack you'd like to change.
The new stacks tab is on the left under Log Messages:

When you click that link, you can click on the log stack and it will take you to this page:

### 2. You can click on a log message event from the Log Messages -> Events dashboard or the All -> Events dashboard, then you can click on a particular log message and click Go To Stack.
If you click Events, you'll see all log events (or all events depending on the dashboard you've chosen):

Then, click on the event and you'll be taken to a details page for that event where you will see a "Go To Stack" button:

### Overriding Global Log Levels
Now, you can override the global log levels for your account. Simply click the log level dropdown, select the new log level setting you'd like to capture in your stacks, and events of the same type or above will be captured, but any log levels below the type selected will no longer be captured.

As with Data Exclusions, updates to project level and global log level settings will be passed down to the Exceptionless client in near real-time. While the Exceptionless server will catch event that should not be included in your dashboard, the client will catch them based on your configuration and prevent them from ever being sent to the server. Read more about [Project Settings](/docs/project-settings) here.
---
[Next > De-Duplication](/docs/deduplication)
- [JavaScript Source Maps](https://exceptionless.com/docs/source-maps/)
# JavaScript Source Maps
Production JavaScript is usually bundled and minified. That makes it fast to download, but it can turn a useful stack frame such as `loadCurrentUser` into a short name such as `a`.
Exceptionless uses source maps to restore the original function names, file names, line numbers, and column numbers before a new error is assigned to a stack. This gives you readable stack traces and helps Exceptionless group errors by the code that actually failed.
You can make source maps available in either of these ways:
| If your source maps are... | Recommended setup |
| --- | --- |
| Publicly available with your application | Deploy them with the generated JavaScript. Exceptionless discovers them automatically. |
| Private or stored only as build artifacts | Upload them to Exceptionless from your deployment pipeline. |
Source maps are applied while new events are processed. Uploading a map does not rewrite events that Exceptionless has already processed.
## Use public source maps
Public source maps require no Exceptionless project configuration and no upload step. For each JavaScript stack frame, Exceptionless:
1. Uses the absolute generated JavaScript URL, line number, and column number reported by the browser.
2. Looks for a source map already stored for that exact generated file URL.
3. If one is not stored, anonymously downloads the generated JavaScript over HTTPS.
4. Checks its `SourceMap` or `X-SourceMap` response header, then its `sourceMappingURL` comment.
5. If neither points to a map, tries the conventional `.map` URL.
6. Validates and caches the map for the project, then restores the original stack frame.
For example, a production build can deploy these files:
```text
https://cdn.example.com/assets/app.a1b2c3.js
https://cdn.example.com/assets/app.a1b2c3.js.map
```
The generated JavaScript normally ends with a relative reference:
```js
//# sourceMappingURL=app.a1b2c3.js.map
```
Exceptionless can also follow an absolute `sourceMappingURL`, a relative URL in a `SourceMap` response header, or an inline data URL.
### Public map requirements
- The generated JavaScript URL in the stack frame must be an absolute HTTPS URL.
- The generated JavaScript and source map must be available without cookies, authentication headers, or an IP allowlist.
- The URL must use the standard HTTPS port.
- The map must be a version 3 flat source map. Indexed maps that contain a `sections` property are not supported.
- The source map must be generated by the same build as the deployed JavaScript.
Content-hashed file names are strongly recommended. A URL such as `app.a1b2c3.js` permanently identifies one build, while a reused URL such as `app.js` can refer to different code over time.
You can confirm that a deployed map is public before releasing it:
```shell
curl --fail --silent --show-error \
"https://cdn.example.com/assets/app.a1b2c3.js.map" \
--output /dev/null
```
Public source maps can contain your original source code in `sourcesContent`. If that code should not be public, generate the map during the build but exclude it from the deployed assets and use the upload workflow instead.
## Upload private source maps
Uploaded maps do not need to be public. Exceptionless associates an upload with the exact generated JavaScript URL that appears in the stack frame, so it can use the map without downloading it from your site.
To upload one map manually:
1. Open your project in Exceptionless.
2. Go to **Project Settings** and select **Source Maps**.
3. Enter the exact absolute **Generated JavaScript URL** shown in the stack trace.
4. Select the matching `.map` file and choose **Upload**.
The generated URL may use HTTP or HTTPS for a manual upload. It must not contain credentials or a fragment. Keep its path and query string exactly as they appear in the stack frame.
Uploading another map for the same generated file URL replaces the existing map. The **Source Maps** page lists both uploaded and automatically discovered maps, when they were added and last used, and lets you delete them.
## Upload source maps from CI/CD
Generate the source maps and production JavaScript in the same build. Upload the maps from that build, then deploy the same generated JavaScript without rebuilding it.
### 1. Create a deployment token
Create the token once in Exceptionless:
1. Open **Project Settings** and select **API Keys**.
2. Choose **Add token**.
3. Select **Source map upload token**.
4. Copy the token and save it as a protected secret named `EXCEPTIONLESS_SOURCE_MAP_TOKEN` in your CI/CD system.
This token has only the `source-maps:write` scope and is restricted to the selected project. It cannot read events, change project settings, or upload maps to another project. Do not use the client API key embedded in your application.
Your pipeline also needs:
- `EXCEPTIONLESS_SERVER_URL`: `https://collector.exceptionless.io` for hosted Exceptionless, or your self-hosted server URL.
- `EXCEPTIONLESS_PROJECT_ID`: the project ID shown in the project URL or project settings.
### 2. Add the upload to your deployment
For each source map produced by the build, send a `multipart/form-data` request containing the map and the exact public URL of its generated JavaScript file:
```shell
curl --fail-with-body --request POST \
"${EXCEPTIONLESS_SERVER_URL}/api/v2/projects/${EXCEPTIONLESS_PROJECT_ID}/source-maps" \
--header "Authorization: Bearer ${EXCEPTIONLESS_SOURCE_MAP_TOKEN}" \
--form-string "generated_file_url=https://cdn.example.com/assets/app.a1b2c3.js" \
--form "file=@dist/assets/app.a1b2c3.js.map;type=application/json"
```
A successful upload returns HTTP `201 Created`.
Add this request after your production build and before the release step. If the build creates multiple JavaScript bundles, repeat it for each `.map` file. How you enumerate those files and construct their public URLs depends on your build tool and deployment layout.
Deploy the same build artifacts that you uploaded maps for. Do not rebuild between the source-map upload and deployment.
## Verify the setup
After the deployment:
1. Open **Project Settings > Source Maps**.
2. Confirm that the generated URL is listed as **Automatic** or **Uploaded**.
3. Send a new test error from the production build.
4. Open the event and confirm that its stack trace shows original file and function names.
5. Return to **Source Maps** later to confirm that **Last used** has been updated. Usage timestamps are persisted asynchronously.
## Troubleshooting
### The map was uploaded, but the stack is still minified
- Compare the uploaded generated URL with the URL in the event stack frame. The path and query string must match.
- Confirm that the map and JavaScript came from the same build.
- Confirm that the stack frame includes a valid line and column number.
- Send a new event. Existing events are not reprocessed after an upload.
- Confirm that the file is a version 3 flat source map, not an indexed map.
### A public map was not discovered
- Confirm that both the generated JavaScript and map return successful responses without authentication.
- Use HTTPS on the standard port. Upload maps for HTTP, custom-port, private-network, or authenticated URLs.
- Check the generated file for `sourceMappingURL`, check its response for `SourceMap` or `X-SourceMap`, or publish the map at `.map`.
- Check **Project Settings > Source Maps**. Successfully discovered maps appear there automatically.
### A deployment replaced files at the same URL
Exceptionless periodically refreshes automatically discovered maps, but immutable content-hashed URLs are safer and avoid ambiguity between releases. Uploaded maps are replaced when you upload another map for the same generated URL.
## Storage and retention
Exceptionless validates downloads, limits their size and processing time, and applies plan-aware discovery and storage limits. Automatic discovery never rejects an event; if a map is unavailable or a limit is reached, Exceptionless keeps the generated stack frame.
By default, free projects retain up to 100 maps and 100 MiB, and paid projects retain up to 1,000 maps and 1 GiB. Maps that have not been used are removed after 14 days on free plans and 90 days on paid plans. Self-hosted administrators can change these values in the `SourceMaps` configuration section.
- [User Sessions](https://exceptionless.com/docs/user-sessions/)
# User Sessions
With user session tracking, you can easily see what a user is doing that leads up to an event occurrence, or just see how they are using your app.
Each session has a list of events (feature usages, exceptions, log messages, etc) that the user triggered. Each can be clicked on to drill down.

Browser and environment information, along with any other data that persists throughout the user session is stored as well.
Once you set up session tracking, you can find the report under Reports > Sessions, or click on the unique session id in any event's overview tab.

## Turn On Session Tracking
Set a default user identity via the following client methods to send the user ID for each event. Once set, it will be applied for all future events.
### C# Set User Identity Example
```csharp
using Exceptionless;
ExceptionlessClient.Default.Configuration.SetUserIdentity("UNIQUE_ID_OR_EMAIL_ADDRESS", "Display Name");
```
### JavaScript Set User Identity Example
```javascript
exceptionless.ExceptionlessClient.default.config.setUserIdentity('UNIQUE_ID_OR_EMAIL_ADDRESS', 'Display Name');
```
**Please Note: In WinForms and WPF applications**, a plugin will automatically set the default user to the `Environment.UserName` if the default user hasn’t been already set. Likewise, if you are in a web environment, we will set the default user to the request principal’s identity if the default user hasn’t already been set.
**If you are using WinForms, WPF, or a Browser App**, you can enable sessions by calling the `UseSessions` extension method.
### C# Use Sessions Example
```csharp
using Exceptionless;
ExceptionlessClient.Default.Configuration.UseSessions();
```
### JavaScript Use Sessions Example
```javascript
exceptionless.ExceptionlessClient.default.config.useSessions();
```
## Manually Send SessionStart, SessionEnd, and heartbeat Events
You can use our client API to start, update, or end a session. Just remember, a user identity must be set.
### C# Submit Session Events Example
```csharp
using Exceptionless;
ExceptionlessClient.Default.SubmitSessionStart();
await ExceptionlessClient.Default.SubmitSessionHeartbeatAsync();
await ExceptionlessClient.Default.SubmitSessionEndAsync();
```
### JavaScript Submit Session Events Example
```javascript
exceptionless.ExceptionlessClient.default.submitSessionStart();
exceptionless.ExceptionlessClient.default.submitSessionHeartbeat();
exceptionless.ExceptionlessClient.default.submitSessionEnd();
```
## Disable Heartbeat
If you would like to disable the near real-time session tracking heartbeat that goes out ever 30 seconds, you can pass `false` as an argument to the `UseSessions()` method.
---
[Next > Notifications](/docs/notifications)
- [Versioning](https://exceptionless.com/docs/versioning/)
# Versioning
You can mark error stacks fixed and they won't show up or notify you until they regress!
## How does this work?
When an event comes into Exceptionless, we figure out what makes it unique and place it into a stack of similar events. This means that an error comes in, it will be placed in a stack of similar error events. All events may contain an application version, this can be used to track what versions of an application are causing errors or being actively used.
## How do I specify an application version?
An application version will try and be resolved if possible, but it's a good idea to specify a version if you can. Please view the client specific documentation below to learn more about setting an app version.
## Choose your Client
* [.NET](/docs/clients/dotnet/)
* [JavaScript / Node.js](/docs/clients/javascript/client-configuration)
## What does mark fixed do?

When you mark a stack as fixed, the following meta data is recorded on the stack:
* when the stack was fixed
* and **optionally** the semantic version that you fixed this behavior in.
> **NOTE:** If you are using a **four-part version number** (E.G., `1.2.3.4`), you'll need to enter it as `1.2.3-4`. We will automatically handle this conversion when processing events.
Next, all stack event occurrences are marked as fixed and will be hidden from all dashboards. You can show fixed events in dashboards by updating the search box with `*` or `fixed:true`.
This meta data is then inspected when an matching event is processed to determine if the stack and all occurrences should be regressed (_marked not fixed_). There are two scenarios where a stack will be marked as regressed:
1. If no fixed in version is specified, any occurrence with a date newer than the date the stack was marked as fixed.
2. If a fixed in version is specified, any occurrence that has a newer version specified (Example: `1.0.0` > `1.0.0-beta`).
---
[Next > Reference Ids](/docs/references-ids)